
Todo in Flutter 19 Sep 2018
Today we’re going to create a Todo application using Flutter. Flutter is a cross platform framework created by Google that uses the Dart language to create Android and iOS applications with a lot of code sharing opportunities. Full source code for this application is available on GitHub.
This post was extra fun for me as I had not used either Flutter or Dart before working on this! I ended up going through Dart’s Language Tour and a free Flutter introduction on Udacity. I highly recommend both if you want to start learning Flutter development. Because this is my first time using Flutter, I’m sure there are optimizations and useful tricks that I missed while creating this post. If you know of anything good that I missed, I’d love to hear about it on Twitter @hofmadresu.
Note: All of my steps are using Visual Code on Mac. Your mileage may vary if you use a different IDE or operating system.
This post is part of a series where I create the same Todo application on iOS and Android using several different systems. To see the other posts in this series, check out the first post.
Tools and Environment
You can develop Flutter applications on Windows, Mac, and Linux. However, iOS development can only be done on Mac, which is why I’m using it for this application. You also have your choice on what IDE you want to use. Flutter’s documentation currently provides setup steps for Android Studio/IntelliJ and Visual Studio Code. I have both installed: Android Studio for easy Android SDK and emulator support, and VS Code for development.
I recommend installing Android Studio no matter what IDE you use for day-to-day coding. As of this posting it has access to more useful tools (though the VSCode community is doing great job adapting them)
Depending on what OSs you’re targeting, you’ll also need to install the Android SDK for Android and XCode for iOS. Flutter provides setup directions here.
Once we have our development environment set up, we can begin coding our app!
Creating Hello World
The first thing we’ll do is create a default app and see what Flutter gives us out of the box on both OSs. To do this we’ll use the VSCode command “Flutter: New Project”. This will prompt us for a project name then set up a hello world type app for us to use as a starting point. When that’s complete we’ll run the app to see what it created. We can run the app on iOS Simulators, Android Emulators, or physical devices. For this post we’ll be using an iPhone X Simulator and an Nexus 5X emulator.
There are a few commands useful for handling devices and running the project that we’ll want to be aware of. The first one is “flutter emulators”. This gives us a list of available simulators and emulators that we can use.
Matts-MacBook-Pro:todo_flutter hofmadresu$ flutter emulators
10 available emulators:

Nexus_5X_API_23     • Nexus 5X      • Google • Nexus 5X API 23
Nexus_5X_API_24     • Nexus 5X      • Google • Nexus 5X API 24
Nexus_5X_API_25     • Nexus 5X      • Google • Nexus 5X API 25
Nexus_5X_API_26     • Nexus 5X      • Google • Nexus 5X API 26
Nexus_5_API_21      • Nexus 5       • Google • Nexus 5 API 21
Nexus_5_API_22      • Nexus 5       • Google • Nexus 5 API 22
Nexus_One_API_25    • Nexus One     • Google • Nexus One API 25
Pixel_2_API_P       • pixel_2       • Google • Pixel 2 API P
Slowpoke_API_25     • Nexus 5X      • Google • Slowpoke_API_25
apple_ios_simulator • iOS Simulator • Apple

To run an emulator, run 'flutter emulators --launch <emulator id>'.
To create a new emulator, run 'flutter emulators --create [--name xyz]'.

You can find more information on managing emulators at the links below:
  https://developer.android.com/studio/run/managing-avds
  https://developer.android.com/studio/command-line/avdmanager
Once we see the list, we’ll use the launch tag to start our simulator and emulator.
Matts-MacBook-Pro:todo_flutter hofmadresu$ flutter emulators --launch "Nexus 5X"
Matts-MacBook-Pro:todo_flutter hofmadresu$ flutter emulators --launch "iOS Simulator"
And finally we’ll use “flutter run -d all” to build and launch our app. The “-d all” parameter tells flutter to deploy to all running devices at the same time so we can see Android and iOS simultaneously.
Matts-MacBook-Pro:todo_flutter hofmadresu$ flutter run -d all
Using hardware rendering with device Android SDK built for x86 64. If you get graphics artifacts, consider enabling software rendering with "--enable-software-rendering".
Launching lib/main.dart on Android SDK built for x86 64 in debug mode...
Initializing gradle...                                       0.9s
Resolving dependencies...                                    6.9s
Running 'gradlew assembleDebug'...                           3.6s
Built build/app/outputs/apk/debug/app-debug.apk.
Launching lib/main.dart on iPhone X in debug mode...
Starting Xcode build...
 ├─Assembling Flutter resources...                    1.3s

 └─Compiling, linking and signing...                  1.9s

Xcode build done.                                            4.8s
Syncing files to device Android SDK built for x86 64...      5.1s
Syncing files to device iPhone X...                          4.1s

🔥  To hot reload changes while running, press "r". To hot restart (and rebuild state), press "R".
An Observatory debugger and profiler on Android SDK built for x86 64 is available at: http://127.0.0.1:50123/
An Observatory debugger and profiler on iPhone X is available at: http://127.0.0.1:50136/
For a more detailed help message, press "h". To quit, press "q".
Once that’s up and running we can see our app running on both OSs.


This initial app doesn’t do much yet, but it gives us the structure we need and some examples of layout and actions we can use to create our Todo app!
Displaying a list of Todo items
The first thing we want to do is create a TodoItem class that will hold our data. We only need 3 properties on this object to cover this app’s functionality: a unique id, a title, and whether-or-not it has been completed. We’ll also extend the Comparable class so we can easily sort our items later. For this we’ll create a new file in the ‘lib’ directory called “todoItem.dart” with the following content:
class TodoItem extends Comparable {
  final int id;
  final String name;
  bool isComplete;

  TodoItem({this.id, this.name, this.isComplete = false});

  @override
  int compareTo(other) {
    if (this.isComplete && !other.isComplete) {
      return 1;
    } else if (!this.isComplete && other.isComplete) {
      return -1;
    } else {
      return this.id.compareTo(other.id);
    }
  }
}
Next we’ll create an initial list screen where we’ll show the Todo items. All UI elements in Flutter are Widgets and extend either StatelessWidget or StatefulWidget. Since our list will include data we can manipulate (the isComplete property) we’ll use Stateful for this screen. StatefulWidgets use 2 main parts: the Widget and a State object. The State object should be named _[WidgetName]State by convention. We’ll first create the Widget by creating a “todoListScreen.dart” file in the lib directory and adding the following content.
import 'package:flutter/material.dart';
import 'todoItem.dart';

class TodoListScreen extends StatefulWidget {
  TodoListScreen({Key key, this.title}) : super(key: key);

  final String title;

  @override
  _TodoListScreenState createState() => new _TodoListScreenState();
}
As you can see, there’s not much to a basic stateful screen widget. The real work happens in the companion State class. We’ll create this in the same file for simplicity’s sake. _TodoListScreenState will handle creating and displaying a static list of Todo items. We’ll also wire up a placeholder button and action that we’ll later use for adding items.
class _TodoListScreenState extends State<TodoListScreen> {
  List<TodoItem> _todoItems = List();

  @override
  initState() {
    super.initState();
    // TODO use dynamic todo items
    _todoItems.add(TodoItem(id: 0, name: "Create First Todo", isComplete: true));
    _todoItems.add(TodoItem(id: 1, name: "Run a Marathon"));
    _todoItems.add(TodoItem(id: 2, name: "Create Todo_Flutter blog post"));
  }

  void _addTodoItem() {
    // TODO navigate to Create Todo Item Screen
  }

  Widget _createTodoItemWidget(TodoItem item) {
    // TODO customize todo item display to show completion status
    return ListTile(
      title: Text(item.name),
    );
  }

  @override
  Widget build(BuildContext context) {
    _todoItems.sort();
    final todoItemWidgets = _todoItems.map(_createTodoItemWidget).toList();

    return Scaffold(
      appBar: AppBar(
        title: Text(widget.title),
      ),
      body: ListView(
        children: todoItemWidgets,
      ),
      floatingActionButton: FloatingActionButton(
        onPressed: _addTodoItem,
        tooltip: 'Add Todo',
        child: Icon(Icons.add),
      ),
    );
  }
}
The last thing we need to do before running the app is update main.dart to use our new TodoListScreen. This mostly involves deleting the placeholder code and importing and using our new class.
import 'package:flutter/material.dart';
import 'todoListScreen.dart';

void main() => runApp(MyApp());

class MyApp extends StatelessWidget {
  // This widget is the root of your application.
  @override
  Widget build(BuildContext context) {
    return MaterialApp(
      title: 'Todo Flutter',
      theme: new ThemeData(
        primarySwatch: Colors.blue,
      ),
      home: TodoListScreen(title: 'Todo List'),
    );
  }
}
I also removed usages of the ‘new’ keyword from this code. Older dart required the keyword but it became optional in dart 2. I’ve decided to omit it from this project as I think it makes reading the widget structure easier. I’m not sure what the best practice for it is.
With that done we can run our app and see a few Todo items.


This is nice, but we probably want to show the user which items are completed. We’ll do this by adding a simple checkbox on the right side of each item. Since we already separated TodoItem widget creation into a separate method, we only need to adjust _createTodoItemWidget in todoListScreen.dart.
Widget _createTodoItemWidget(TodoItem item) {
return ListTile(
title: Text(item.name),
contentPadding: EdgeInsets.all(16.0),
trailing: Checkbox(
value: item.isComplete,
onChanged: (value) => { }
),
);
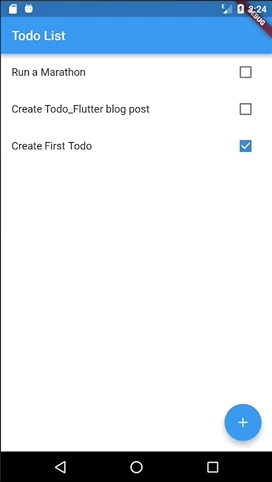
}This will let our users see which items are complete and which still need to be done.


Completing, Uncompleting and Deleting Items
Now that we’re showing our list of Todos, we should let the user interact with them. We’ll start by adding the ability to complete, uncomplete, and delete items from the list. These will all be in-memory operations to start with. Later we’ll add persistance to the app so these actions are saved.
The first thing we’ll add is complete and uncomplete functionality. The user will trigger these changes by tapping on the checkbox we created in the last section. We need to add a new private method to _TodoListScreenState called _updateTodoCompleteStatus(TodoItem item, bool newStatus). There we’ll copy our item list and update the target’s completed status. Then we’ll call setState to tell Flutter to update our state and refresh the UI. Last we’ll update the checkbox in _createTodoItemWidget to call our new method.
Note: Our new method is not particularly efficient. If we were building a production-quality app that could have a long list we would want to use a smarter algorithm
void _updateTodoCompleteStatus(TodoItem item, bool newStatus) {
final tempTodoItems = _todoItems;
tempTodoItems.firstWhere((i) => i.id ==item.id).isComplete = newStatus;
setState(() { _todoItems = tempTodoItems; });
// TODO: Persist change
}
...
Widget _createTodoItemWidget(TodoItem item) {
return ListTile(
title: Text(item.name),
trailing: Checkbox(
value: item.isComplete,
onChanged: (value) => _updateTodoCompleteStatus(item, value),
),
);
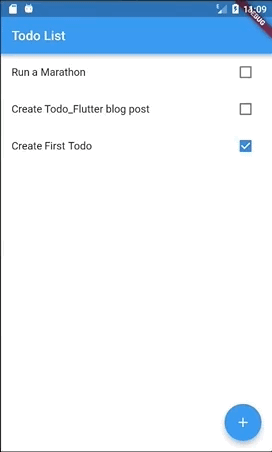
}Now when we run the app we can see the list updating when todo items are completed and uncompleted.


Next we should let the user delete Todo items. We’re going to add this as an action on each item’s long press. When the user long presses a Todo item we’ll display an AlertDialog confirming that they want to delete that item. We’ll allow them to cancel either by tapping away from the dialog or tapping a ‘Cancel’ button. They can confirm the deletion by tapping a ‘Delete’ button.
These changes will all be made in our todoListScreen.dart. First we’ll create a private method that deletes a Todo item. This will look similar to our _updateTodoCompleteStatus method.
void _deleteTodoItem(TodoItem item) {
  final tempTodoItems = _todoItems;
  tempTodoItems.remove(item);
  setState(() { _todoItems = tempTodoItems; });
  // TODO: Persist change
}
Next we’ll create a method to display our Alert Dialog and handle button presses. The method for displaying the dialog, showDialog
Futures are what Dart uses for asynchronous programming. It’s a bit much to get into here, but if you’re interested you can read about them in Dart’s tutorial.
...
import 'dart:async';
...
Future<Null> _displayDeleteConfirmationDialog(TodoItem item) {
  return showDialog<Null>(
    context: context,
    barrierDismissible: true, // Allow dismiss when tapping away from dialog
    builder: (BuildContext context) {
      return  AlertDialog(
        title: Text("Delete TODO"),
        content: Text("Do you want to delete \"${item.name}\"?"),
        actions: <Widget>[
          FlatButton(
            child: Text("Cancel"),
            onPressed: Navigator.of(context).pop, // Close dialog
          ),
          FlatButton(
            child: Text("Delete"),
            onPressed: () {
              _deleteTodoItem(item);
              Navigator.of(context).pop(); // Close dialog
            },
          ),
        ],
      );
    }
  );
}
Finally we’ll update _createTodoItemWidget to call _displayDeleteConfirmationDialog on a Todo’s long press.
Widget _createTodoItemWidget(TodoItem item) {
  return ListTile(
    ...
    onLongPress: () => _displayDeleteConfirmationDialog(item),
  );
}
With that in place we can run our app and see Delete in action!

Persisting the Todo List
Our users can now edit and delete their Todo items. However we’re just storing these changes in memory, so they’ll be lost if the user closes our app. The next thing we should put in place is data persistence so changes are kept across app restarts and device reboots.
We’re going to use a SQLite database to store, update, delete, and retrieve our Todo Items. sqflite is a Flutter plugin that allows us to access SQLite databases and provides useful helpers that reduce how much raw SQL we need to write. It also allows for raw SQL queries if they’re needed.
To install this plugin, all we need to do is edit the pubspec.yaml file and add a dependency on sqflite. Once added, VSCode will automatically download the necessary files and place them in our project.
dependencies:
  ...
  sqflite: any
Current instructions from sqflite say to use “any”. This may change in the future
sqflite’s helper methods use maps to handle interacting with the database. In order to take advantage of this, we’ll need to update TodoItem with a “fromMap” constructor and “toMap” method. We’ll also remove “id” from the default constructor so we can use the database’s AutoIncrement functionality.
class TodoItem extends Comparable {
  int id;
  final String name;
  bool isComplete;

  TodoItem({this.name, this.isComplete = false});

  TodoItem.fromMap(Map<String, dynamic> map)
  : id = map["id"],
    name = map["name"],
    isComplete = map["isComplete"] == 1;

  @override
  int compareTo(other) {
    if (this.isComplete && !other.isComplete) {
      return 1;
    } else if (!this.isComplete && other.isComplete) {
      return -1;
    } else {
      return this.id.compareTo(other.id);
    }
  }

  Map<String, dynamic> toMap() {
    var map = <String, dynamic>{
      "name": name,
      "isComplete": isComplete ? 1 : 0
    };
    // Allow for auto-increment
    if (id != null) {
      map["id"] = id;
    }
    return map;
  }
}
Storing and Retrieving Todo Items
With that in place we can create our data access logic. We’ll create a file called ‘dataAccess.dart’ in the lib folder. This file will contain a DataAccess class that uses Dart’s factory constructor to create a singleton object.
class DataAccess {
  static final DataAccess _instance = DataAccess._internal();
  Database _db;

  factory DataAccess() {
    return _instance;
  }

  DataAccess._internal();
}
Next we’ll add an ‘open’ method that handles creating and opening our database, creating a TodoItems table, and populating the table if needed. This requires us to add a couple import statements as well.
import 'dart:async';
import 'package:sqflite/sqflite.dart';
import 'todoItem.dart';

final String todoTable = "TodoItems";

class DataAccess {
  ...
  Database _db;
  ...
  Future open() async {
    var databasesPath = await getDatabasesPath();
    String path = databasesPath + "\todo.db";

    _db = await openDatabase(path, version: 1,
        onCreate: (Database db, int version) async {
          await db.execute('''
            create table $todoTable (
            id integer primary key autoincrement,
            name text not null,
            isComplete integer not null)
            ''');
    });

    // This is just a convenience block to populate the database if it's empty.
    // We likely wouldn't use this in a real application
    if((await getTodoItems()).length == 0) {
      insertTodo(TodoItem(name: "Create First Todo", isComplete: true));
      insertTodo(TodoItem(name: "Run a Marathon"));
      insertTodo(TodoItem(name: "Create Todo_Flutter blog post"));
    }
  }
  ...
Note: The data population code is just for our convenience. We probably wouldn’t have this in the end product if it were a real app
We also need to add insert and get methods so we can interact with the database.
...
Future<List<TodoItem>> getTodoItems() async {
var data = await _db.query(todoTable);
return data.map((d) => TodoItem.fromMap(d)).toList();
}

Future insertTodo(TodoItem item) {
return _db.insert(todoTable, item.toMap());
}
...
This gives us everything we need to fetch our default Todo list from the database. Now we need to update todoListScreen to read our initial state from the database.
...
import 'dart:async';
import 'dataAccess.dart';
...
class _TodoListScreenState extends State<TodoListScreen> {
List<TodoItem> _todoItems = List();
DataAccess _dataAccess;
_TodoListScreenState() {
_dataAccess = DataAccess();
}
@override
initState() {
super.initState();
_dataAccess.open().then((result) {
_dataAccess.getTodoItems()
.then((r) {
setState(() { _todoItems = r; });
});
});
}
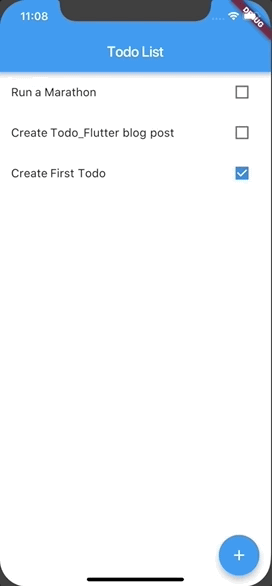
...If we run our app now we’ll see our Todo list populated by data from our database! This won’t look any different from before, since we used the same default items, but it sets up all the structure we need to persist update and delete commands!
Updating and Deleting Todo Items
Both updating and deleting our Todo items involve very similar code, so we’ll handle them at the same time. The first thing we need to do is add ‘update’ and ‘delete’ methods to our dataAccess.dart file.
...
Future updateTodo(TodoItem item) {
  return _db.update(todoTable, item.toMap(),
    where: "id = ?", whereArgs: [item.id]);
}

Future deleteTodo(TodoItem item) {
  return _db.delete(todoTable, where: "id = ?", whereArgs: [item.id]);
}
...
With that done we can update _TodoListScreenState’s update and delete methods to call our new DataAccess methods and to use getTodoItems to retrieve the updated state.
...
void _updateTodoCompleteStatus(TodoItem item, bool newStatus) {
  item.isComplete = newStatus;
  _dataAccess.updateTodo(item);
  _dataAccess.getTodoItems()
    .then((items) {
      setState(() { _todoItems = items; });
    });
}

void _deleteTodoItem(TodoItem item) {
  _dataAccess.deleteTodo(item);
  _dataAccess.getTodoItems()
    .then((items) {
      setState(() { _todoItems = items; });
    });
}
...
Note: This wouldn’t be the best way to update our UI if we had a lot of data. I decided to use simpler code as data-access efficiency isn’t the purpose of this post
Adding Todo Items
At this point we can update and delete Todo items and see the changes preserved across app restarts and device reboots! However this still isn’t much good without the ability to add new Todo items. We’ll add this feature on a new screen that the user navigates to by clicking the ‘+’ FloatingActionButton on todoListScreen.
The first things we need to do are create an AddTodoItemScreen and navigate to it when the user taps our FloatingActionButton. We’re going add a new file called addTodoItemScreen.dart to the lib directory and create AddTodoItemScreen as a stateful widget. Our initial version will be a static layout that doesn’t need state, but we’ll need it when we add real functionality. This is very similar to how we created the TodoListScreen.
import 'package:flutter/material.dart';

class AddTodoItemScreen extends StatefulWidget {
  @override
  State<StatefulWidget> createState() => new _AddTodoItemScreenState();
}

class _AddTodoItemScreenState extends State<AddTodoItemScreen> {
  @override
  Widget build(BuildContext context) {
    return Scaffold(
        appBar: AppBar(title: Text("Add Todo Item")),
        body: Container(
          padding: EdgeInsets.all(16.0),
          child: Column(
            mainAxisSize: MainAxisSize.min,
            children: <Widget>[
              TextFormField(decoration: InputDecoration(labelText: "Todo Name")),
              Row(
                mainAxisAlignment: MainAxisAlignment.spaceEvenly,
                children: <Widget>[
                  RaisedButton(
                    child: Text("Cancel"),
                    onPressed: () {
                      Navigator.pop(context);
                    },
                  ),
                  RaisedButton(
                    child: Text("Save"),
                    onPressed: () {
                      //TODO: Save
                      Navigator.pop(context);
                    },
                  )
                ],
              )
            ],
          )
        )
      );
  }
}
One new thing we used in this widget is Navigator.pop(context). Flutter has a built in navigator with push (navigate forward) and pop (navigate back) functionality. Here we’re using pop to send the user back to TodoListScreen when they click either Cancel or Save. Based on that, you probably have a pretty good guess how we’re going to navigate to our new screen: Navigator.push(). There is one tricky thing with this method that is a little non-intuitive the first time you use it: it takes a Route<T> as a parameter instead of our screen’s widget. Since we’re using the Material package, we’ll use MaterialPageRoute. We’ll call this method in _TodoListScreenState._addTodoItem().
...
void _addTodoItem() {
  Navigator.push(context, MaterialPageRoute(builder: (context) => AddTodoItemScreen()));
}
...
Now we can navigate between our two screens!
Next we’ll write our ‘add todo’ logic. This will insert a new TodoItem into our database based on text the user enters on AddTodoItemScreen. In order to do this we need to be able to get the entered text. This is not a direct property of TextField (or FormTextField in our case), so this is where we’ll use the state of our StatefulWidget. We’ll add a TextEditingController to our FormTextField which will allow us to read the entered text. We also need to make sure to dispose of TextEditingController when our state widget is disposed.
import 'dataAccess.dart';
import 'todoItem.dart';
...
class _AddTodoItemScreenState extends State<AddTodoItemScreen> {
  final _todoNameController = TextEditingController();

  @override
  Widget build(BuildContext context) {
...
              TextFormField(
                decoration: InputDecoration(labelText: "Todo Name"),
                controller: _todoNameController,
              ),
...
                  RaisedButton(
                    child: Text("Save"),
                    onPressed: () {
                      // Here we're depending on TodoListScreen to have opened our database
                      // In a real app we would want to design this more robustly
                      DataAccess().insertTodo(TodoItem(name: _todoNameController.text));
                      Navigator.pop(context);
                    },
                  )
...
  @override
  void dispose() {
    _todoNameController.dispose();
    super.dispose();
  }
}
If we run the app now we’ll be able to add new TodoItems to our database! However, we’ll quickly notice something important is missing: TodoListScreen doesn’t show the new item. This is because we haven’t told the list to update.
An easy way to do this is to ‘await’ our call to Navigator.push then refresh our list from the database. This works because Navigator.push returns a Future after we call Navigator.pop on the target screen.
This can also be used to return a result from the target screen. In our case we could return a boolean that tells us if the user created a new Todo. Then we could refresh the list only when changes were made
void _addTodoItem() async {
  await Navigator.push(context, MaterialPageRoute(builder: (context) => AddTodoItemScreen()));
  _dataAccess.getTodoItems()
              .then((r) {
                setState(() { _todoItems = r; });
              });
}
Note that we added the async modifier to _addTodoItem() since we’re now using await inside it
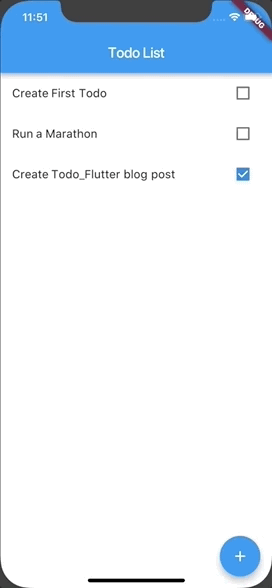
With that in place we can add TodoItems and see them appear on our list!

And that’s it! We now have a working Todo application that runs in both iOS and Android! There’s definitely a lot more we could do on this, like adding validation and customizing styles, but we’re up and running with a basic app.