Todo in React Native 07 Jun 2018
In this post we’re going to build a basic Todo application using React Native. React Native is a cross platform tool created by Facebook that lets you build iOS and Android applications. It provides a lot of code sharing between applications, both from your business logic and at least some of your UI code. This doesn’t include platform specific controls, like Android’s Floating Action Button, or native behaviors, like notifications, but it still allows a lot of re-use. Let’s get started by seeing what React Native gives out-of-the-box with a Hello World application. Full source code for this application is available on GitHub
This post is part of a series where I create the same Todo application on iOS and Android using several different systems. To see the other posts in this series, check out the first post.
Tools and Environment
The first things you need for developing with React Native are Node.js, npm, a text editor, and terminal access. If you plan to develop for iOS and use a simulator, you must develop on a Mac machine (at least at the time of this writing). Android can be developed in any environment.
React Native has a few different ways you can set up your environment depending on what level of development you’re doing:
- If you’re just looking for a quick prototype, you can use the command create-react-native-app to get up and running without any additional setup. This will let you run your application on physical devices using the Expo tool. This has the advantage of letting you get up-and-running without installing any platform specific development tools, but doesn’t let you run on simulators or build native code into your project.
- If you know you don’t need to build native code into your project but want to run on simulators as well as physical devices (highly recommended for production quality projects) you can still use create-react-native-app. However you’ll also need to install XCode and the Android development libraries (most easily installed with Android Studio).
- If you’re building a more complex object that needs native code, you have 2 options: you can use create-react-native-app and the “eject” command, or you can use the react-native command. Both require XCode and the Android development libraries.
For more in-depth details, React Native provides good instructions for all options at its getting started page.
Creating Hello World
We’re going to use the second option today so we don’t have to rely on having physical devices but get the simple setup. I have node 8.11.2 and npm 6.0.1 installed and will be using the iPhone X simulator and a Nexus 5x API 26 emulator. First we need to install create-react-native-app.
npm install -g create-react-native-appThen we’ll open our terminal to the directory where we want to create our project and run the following commands to create and start our project.
    create-react-native-app TodoReactNative
    cd TodoReactNative
    npm start
This will start the application using Expo and give us the following options.
 › Press a to open Android device or emulator, or i to open iOS emulator.
 › Press s to send the app URL to your phone number or email address
 › Press q to display QR code.
 › Press r to restart packager, or R to restart packager and clear cache.
 › Press d to toggle development mode. (current mode: development)
Finally we’ll run our application on the iOS simulator and Android emulator. Make sure to start your emulator through Android Studio (or whatever tool you’re using) before following this step. In our terminal we’ll type “i” and wait for it to launch then type “a”.
On the Android emulator we’ll see a request for permissions. Follow the instructions and hit ‘back’.
The Expo app crashed when I first ran this. If this happens to you, just hit ‘a’ again in your terminal to re-launch.
On the iOS emulator we’ll see a “Welcome to Expo” screen. Click “Got it” to proceed to our app.
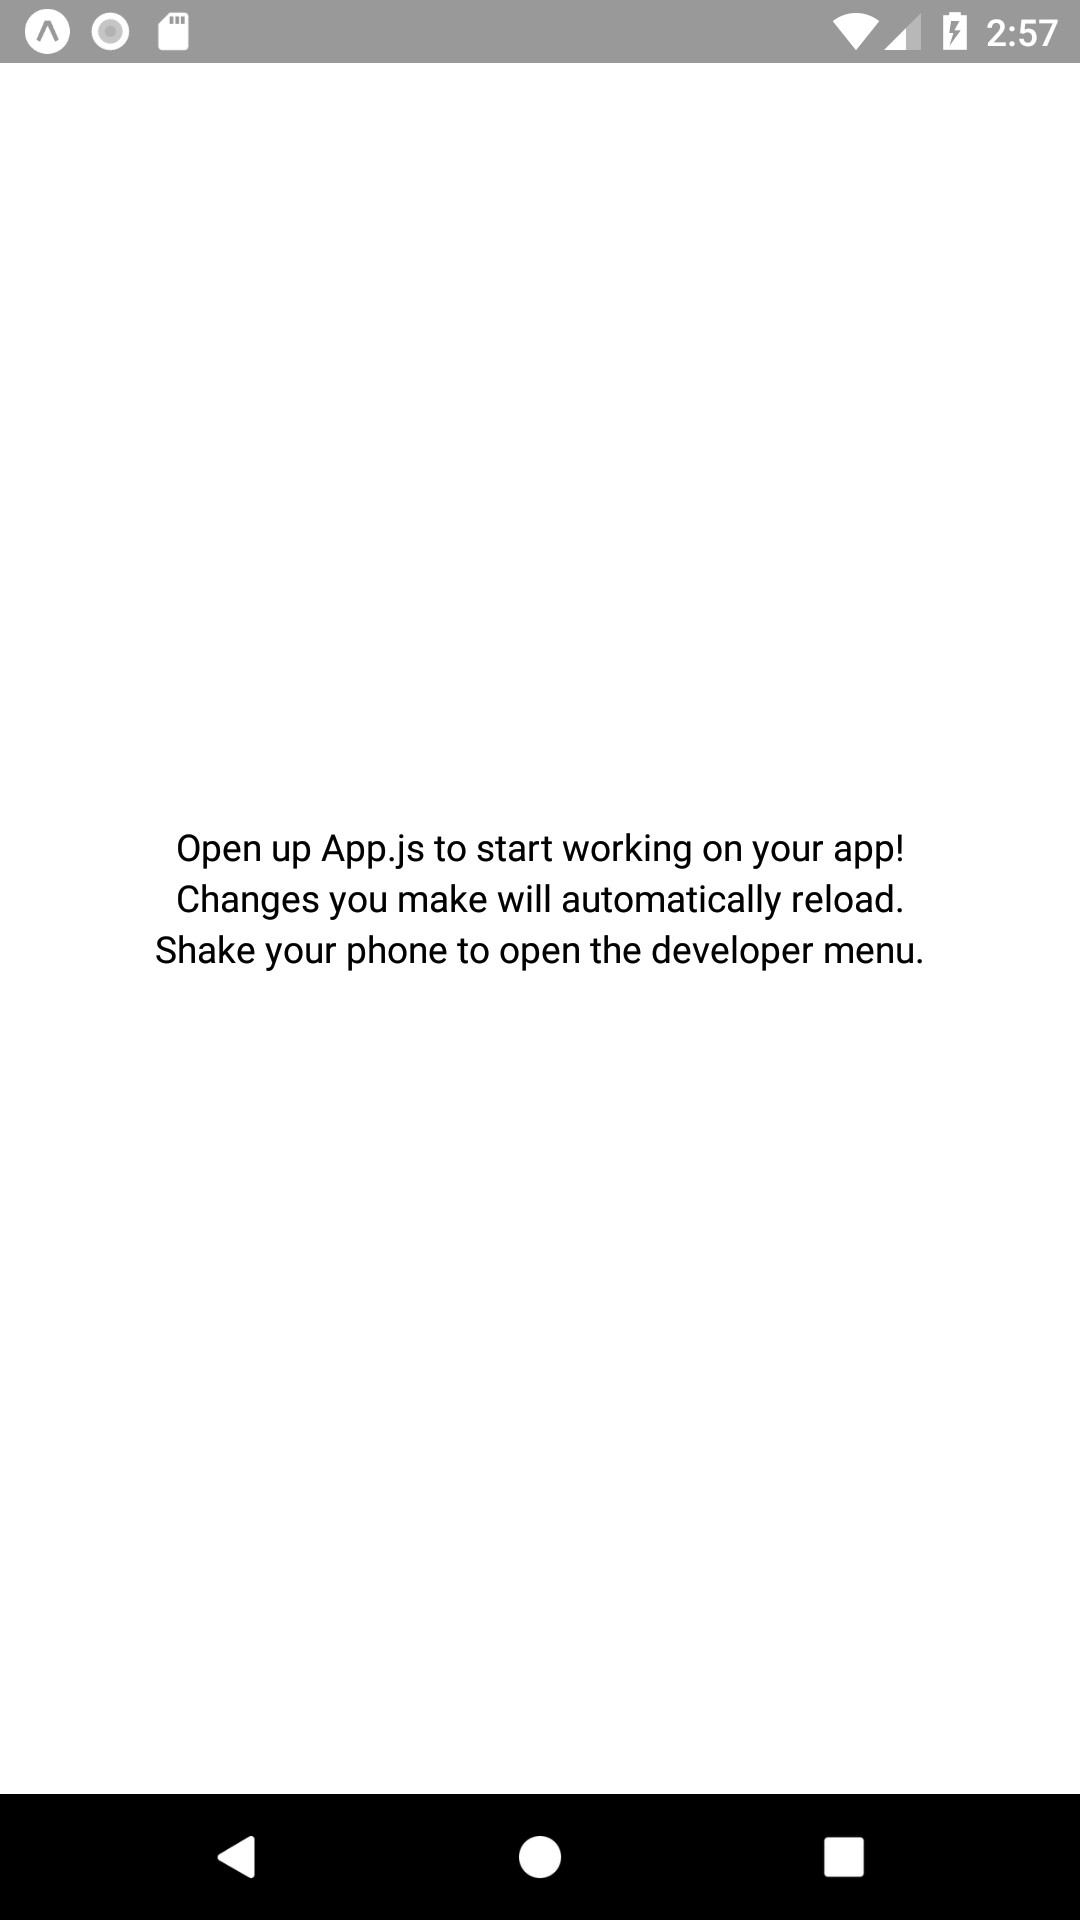
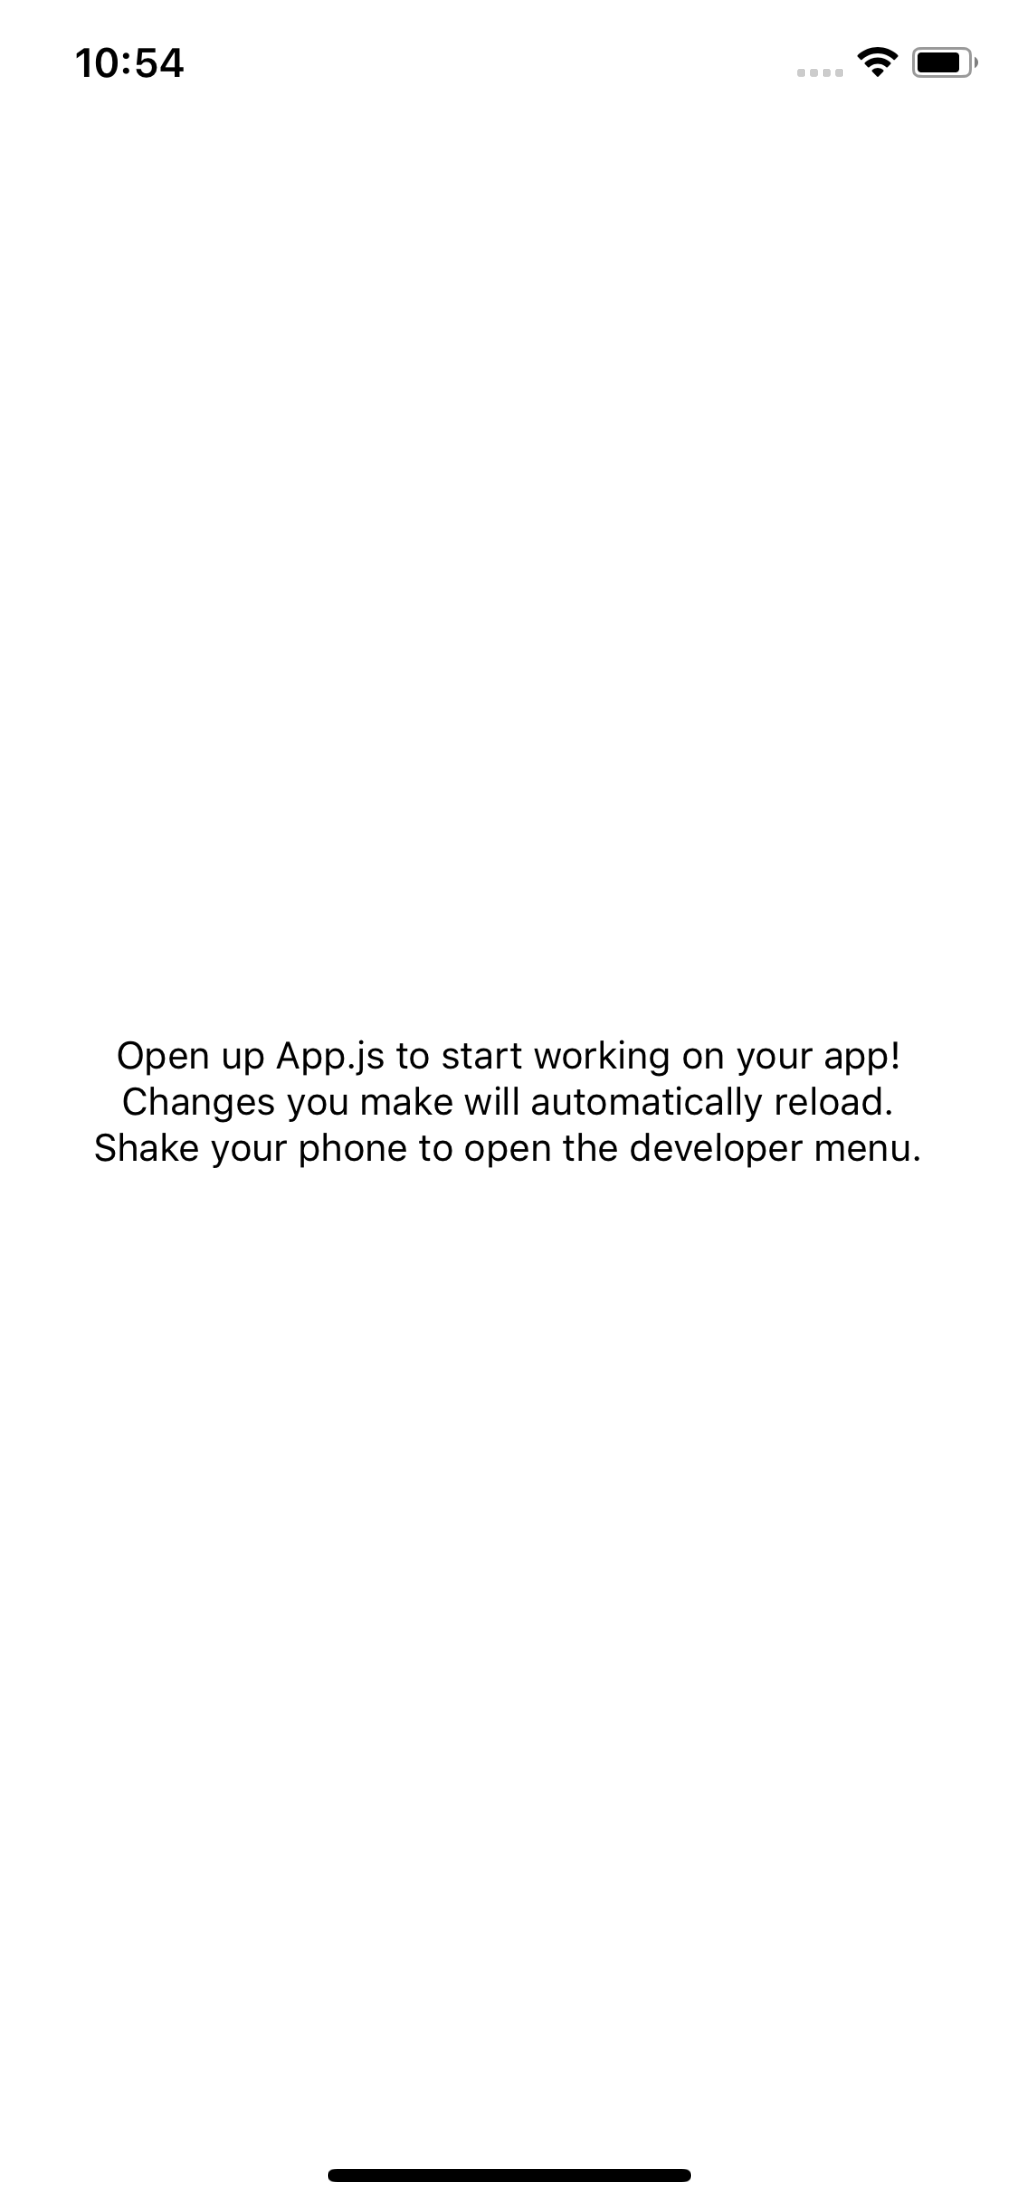
Now that we have see our hello world up and running on both OSs, it’s time to begin building our app!
Displaying a list of Todo items
The first thing we want to do is set up our main todo list
If you’re already familiar with the React ecosystem you probably know about libraries like Redux and the Flux architecture and wonder why we’re not using those. Basically they’re a big enough topic that it felt like adding that would be too much for a single post. If you don’t already know about those, don’t worry about it :)
React, and by extension React Native, is interesting because it takes a very explicitly component-driven view for creating the UI. We want to think of each individual portion of our UI from the bottom up and decide what parts should be encapsulated into their own component. This, of course, can be refactored and adjusted as we go, but it’s good to put some initial thought into it. For our initial todo list we’re going to create 2 components: a TodoItemComponent, which handles displaying the individual item, and a TodoListComponent, which handles displaying a list of TodoItemComponent.
Note: The naming convention we’re using for our components is optional. On larger projects you may find it better to use a different convention or use folders to separate file types
The first thing we need to do is decide on what our todo data will look like. Since this is a simple app, we can get away with a very simple object that contains a key (unique id), title, and isCompleted. Let’s create a starting list by opening App.js and adding the following code above the App class:
...
const todoItems = [
  { key: '0', title: "Create first todo", isCompleted: true },
  { key: '1', title: "Climb a mountain", isCompleted: false },
  { key: '2', title: "Create React Native blog post", isCompleted: false },
 ];
...
Next we’ll create our TodoItemComponent. React has two main ways we can create components: class and functional. Class components are used when you need to maintain non-persisted state (like text input) and functional components are used when that isn’t needed (there’s more nuance to this, but that’s enough to get going). Since this will be a very simple component that just handles displaying data, we’re going to use a functional component. We’ll create a new file called TodoItemComponent.js and export a function that takes in our item’s title and displays it with a bottom border.
import React from 'react';
import { StyleSheet, Text, View } from 'react-native';

export default function TodoItem({title, ...props}) {
  return (
    <View style={styles.container}>
      <View style={styles.content}>
        <Text>{title}</Text>
      </View>
      <View style={styles.border} />
    </View>
  );
}

const styles = StyleSheet.create({
  container: {
    display: 'flex',
    flexDirection: 'column',
    height: 40,
    backgroundColor: '#fff',
  },
  content: {
    flexGrow: 1,
    justifyContent: 'center',
  },
  border: {
    height: 1,
    backgroundColor: '#aaa',
  },
});
Note: React Native uses a JavaScript variant of CSS to handle styles. I’ll try to keep the styles fairly simple, the most advanced will be flexbox, but a working knowledge of CSS is very useful when developing on React Native.
Now we need to create our list. This will be another simple component that just displays data, so we’ll use a functional component again. We’ll create a new file called TodoListComponent.js with the following code:
import React from 'react';
import { StyleSheet, FlatList } from 'react-native';
import TodoItemComponent from './TodoItemComponent';

export default function TodoList({todoItems, ...props}) {
  return (
    <FlatList style={styles.container}
      data={todoItems}
      renderItem={({item, index, section}) => <TodoItemComponent {...item} />}
    />
  );
}

const styles = StyleSheet.create({
  container: {
    flex: 1,
    backgroundColor: '#fff',
  },
});
This is structurally similar to our TodoItemComponent with two differences I want to call out. First, we used a new component from ReactNative called FlatList. This handles displaying our list with a lot of added benefits over doing it ourselves, like scrolling and item virtualization (for memory optimization). Second we used our TodoItemComponent in this file, so we needed to import it at the top of this file.
The final thing we need to do is adjust our App.jsx file to display this list. We need to import TodoListComponent and change our render method to display our new content:
...
import TodoList from './TodoListComponent';
...
  render() {
    return (
      <TodoList todoItems={todoItems} />
    );
  }
...
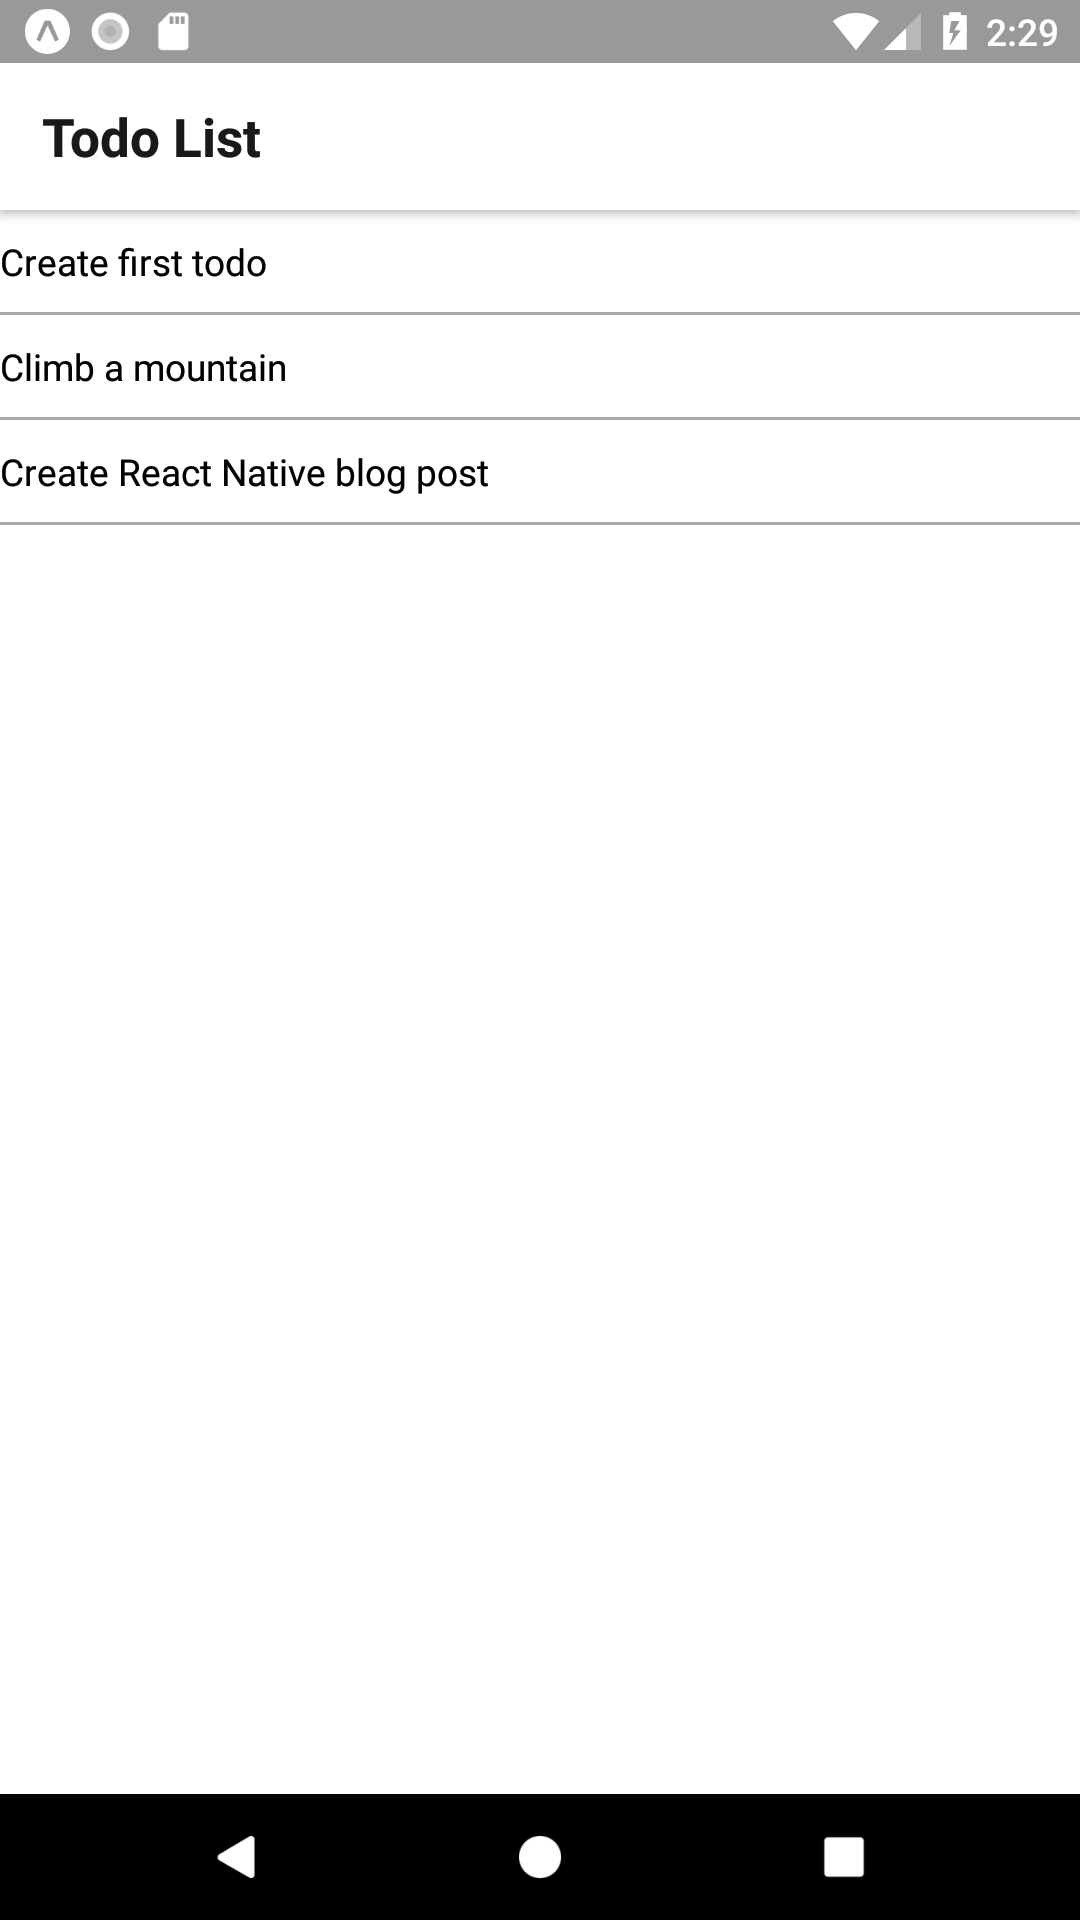
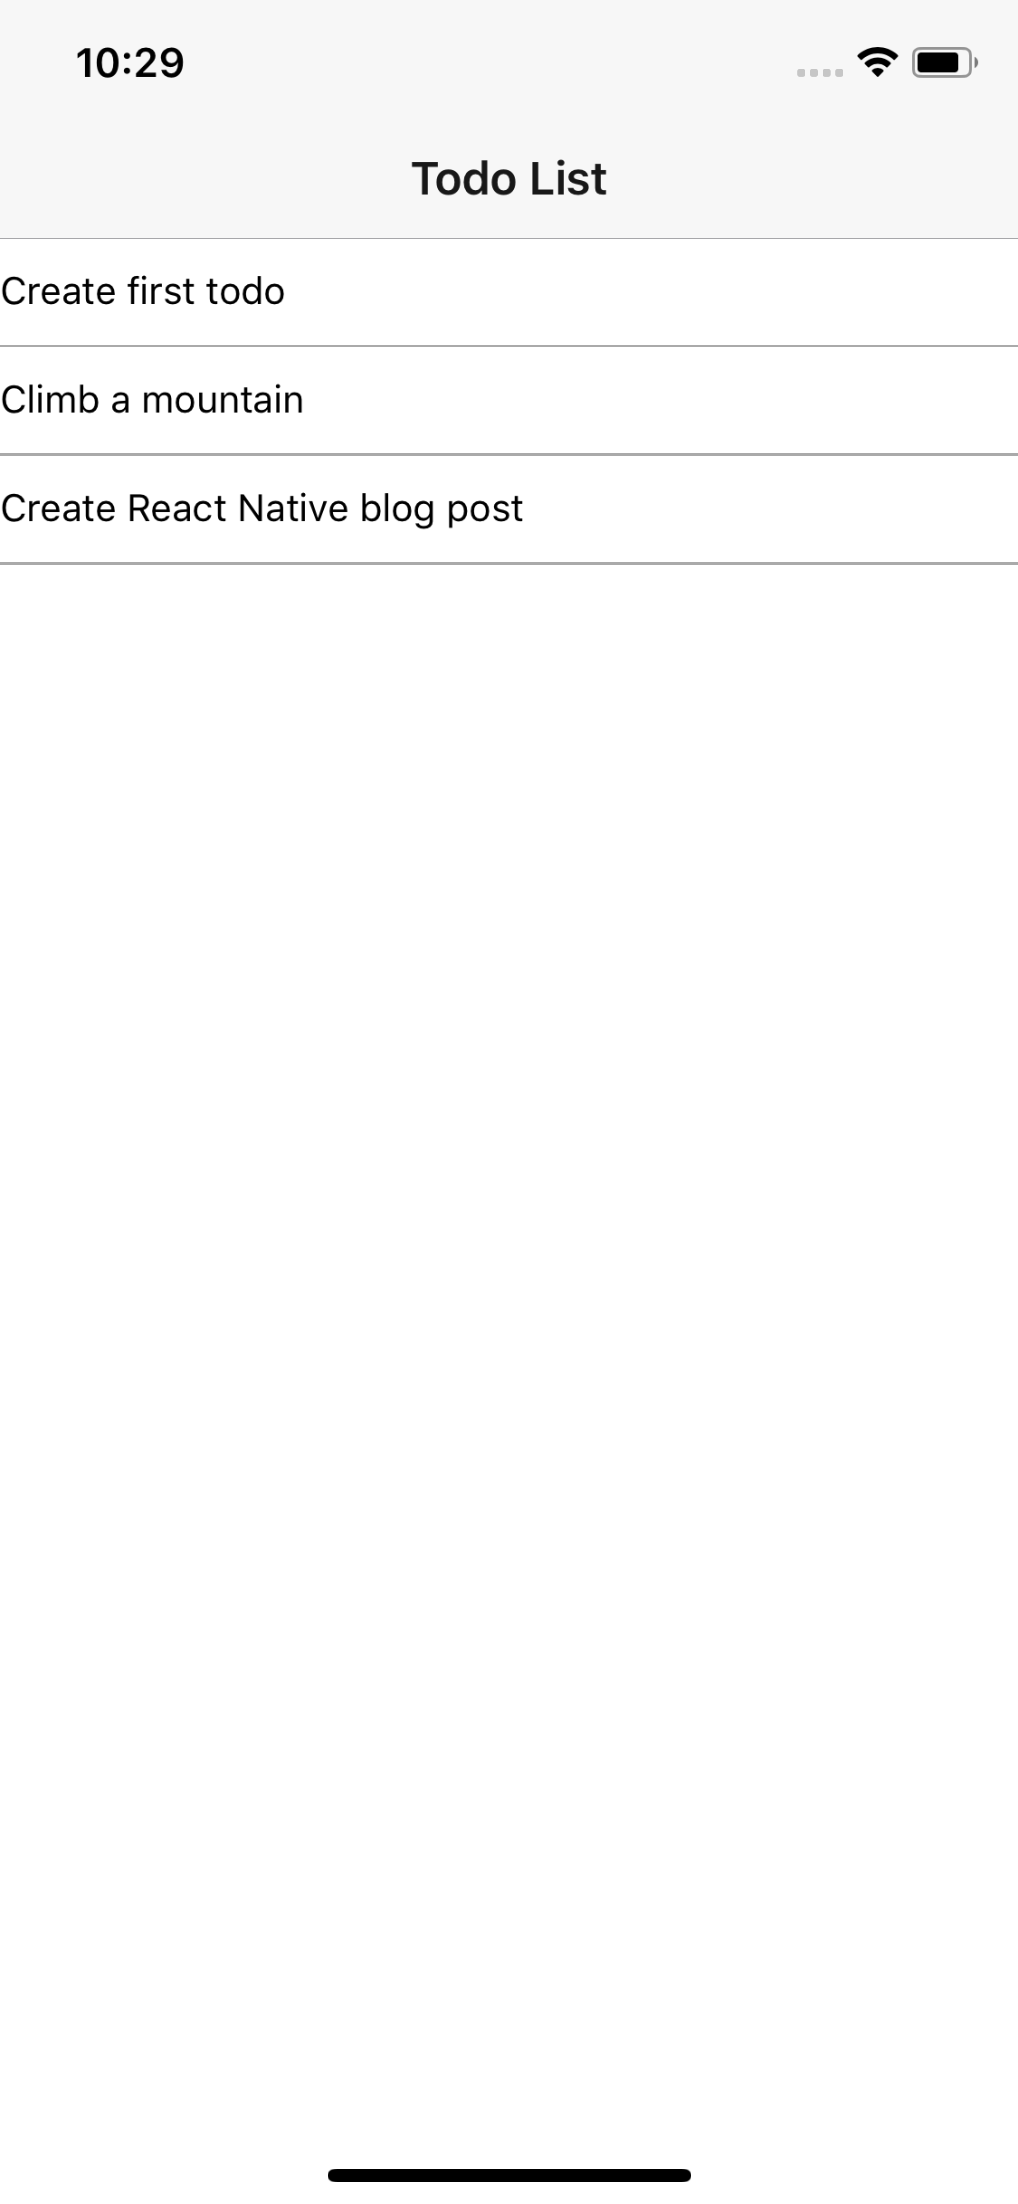
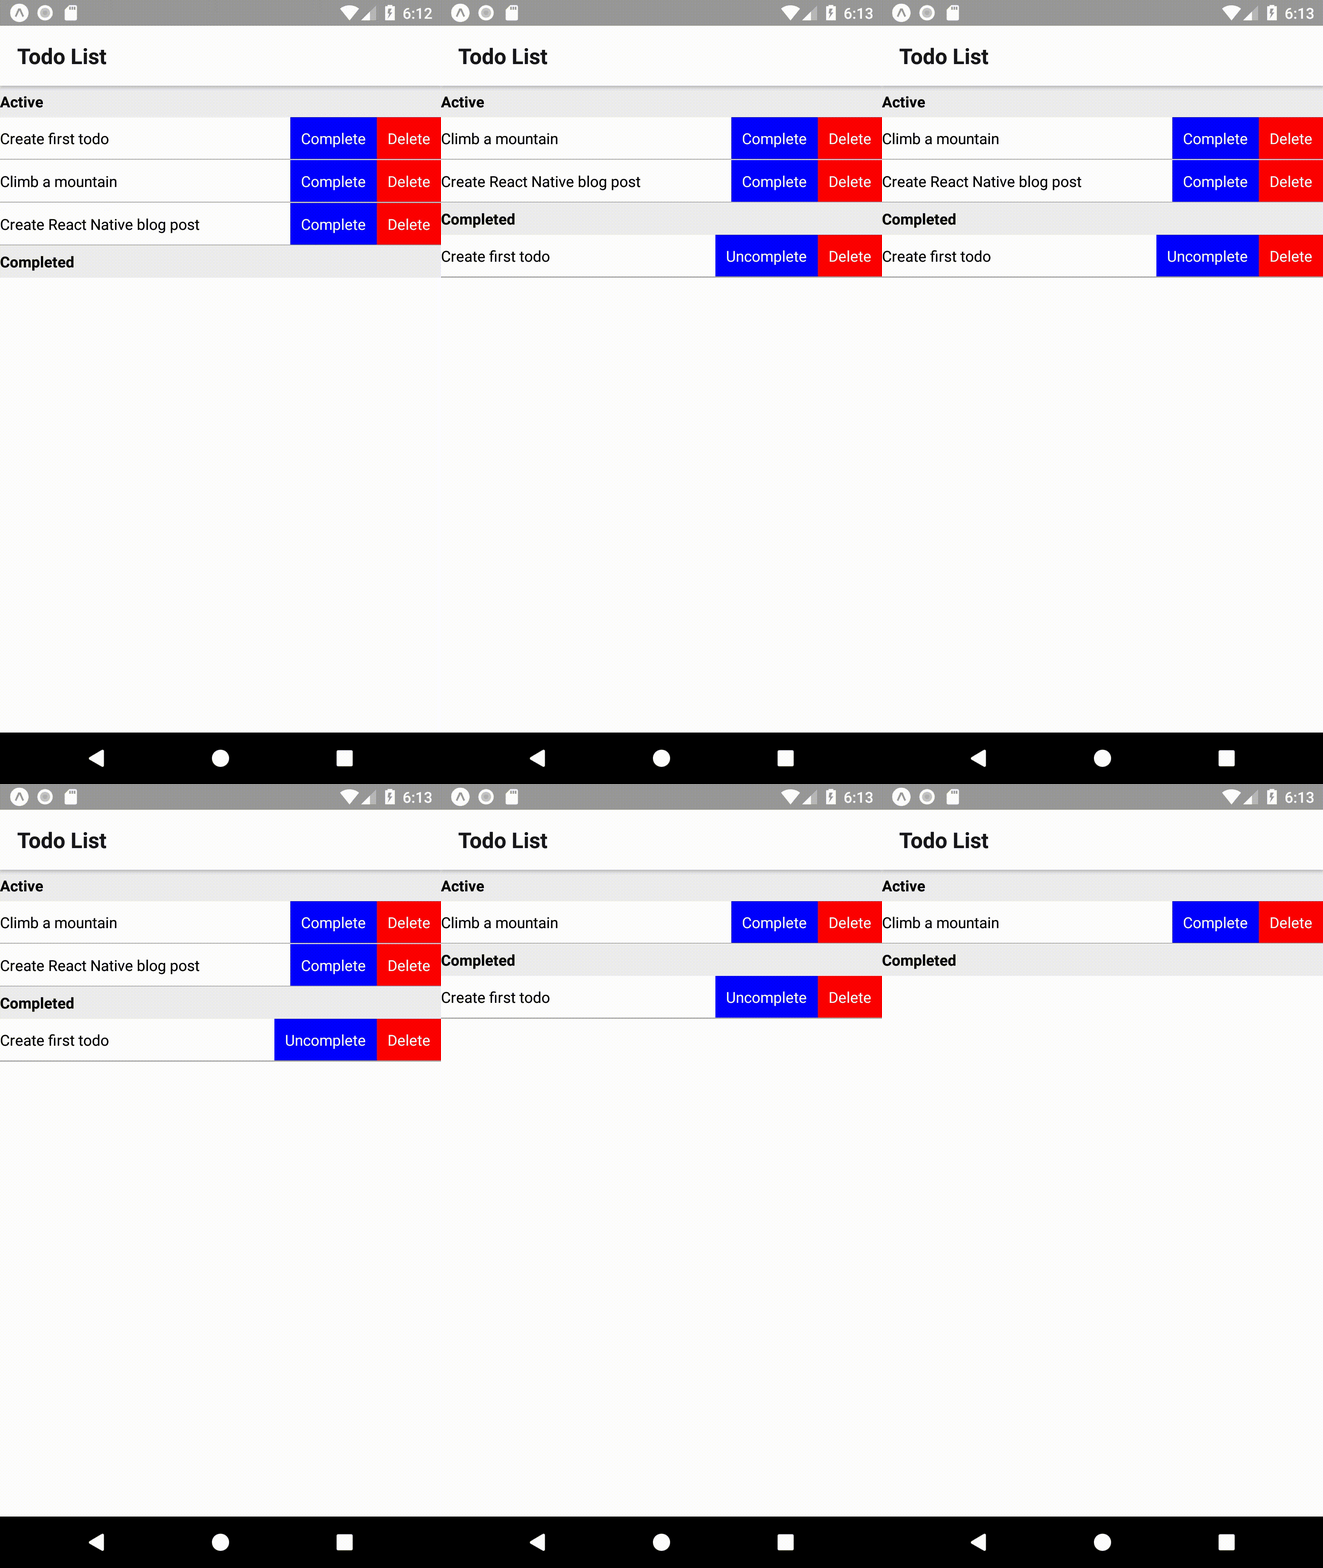
Now when we run our app we can see our todo items in a list!
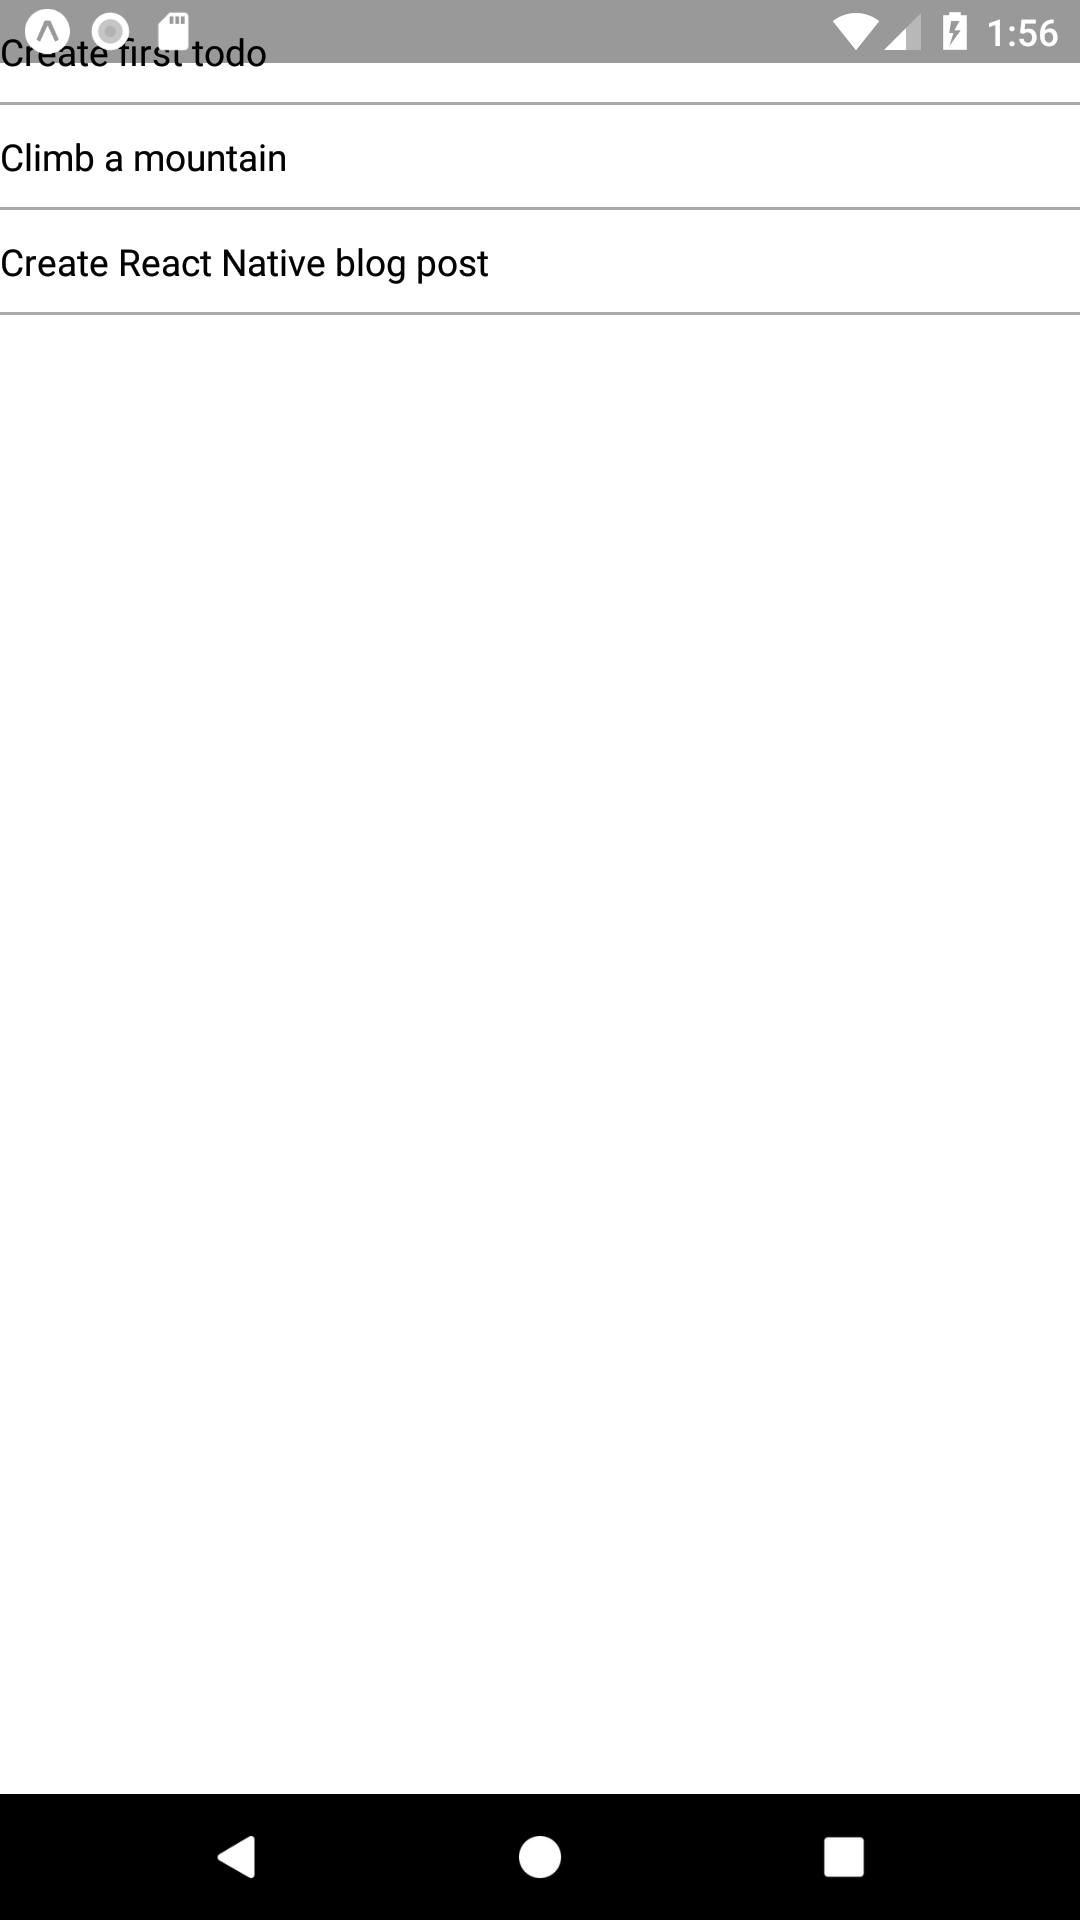
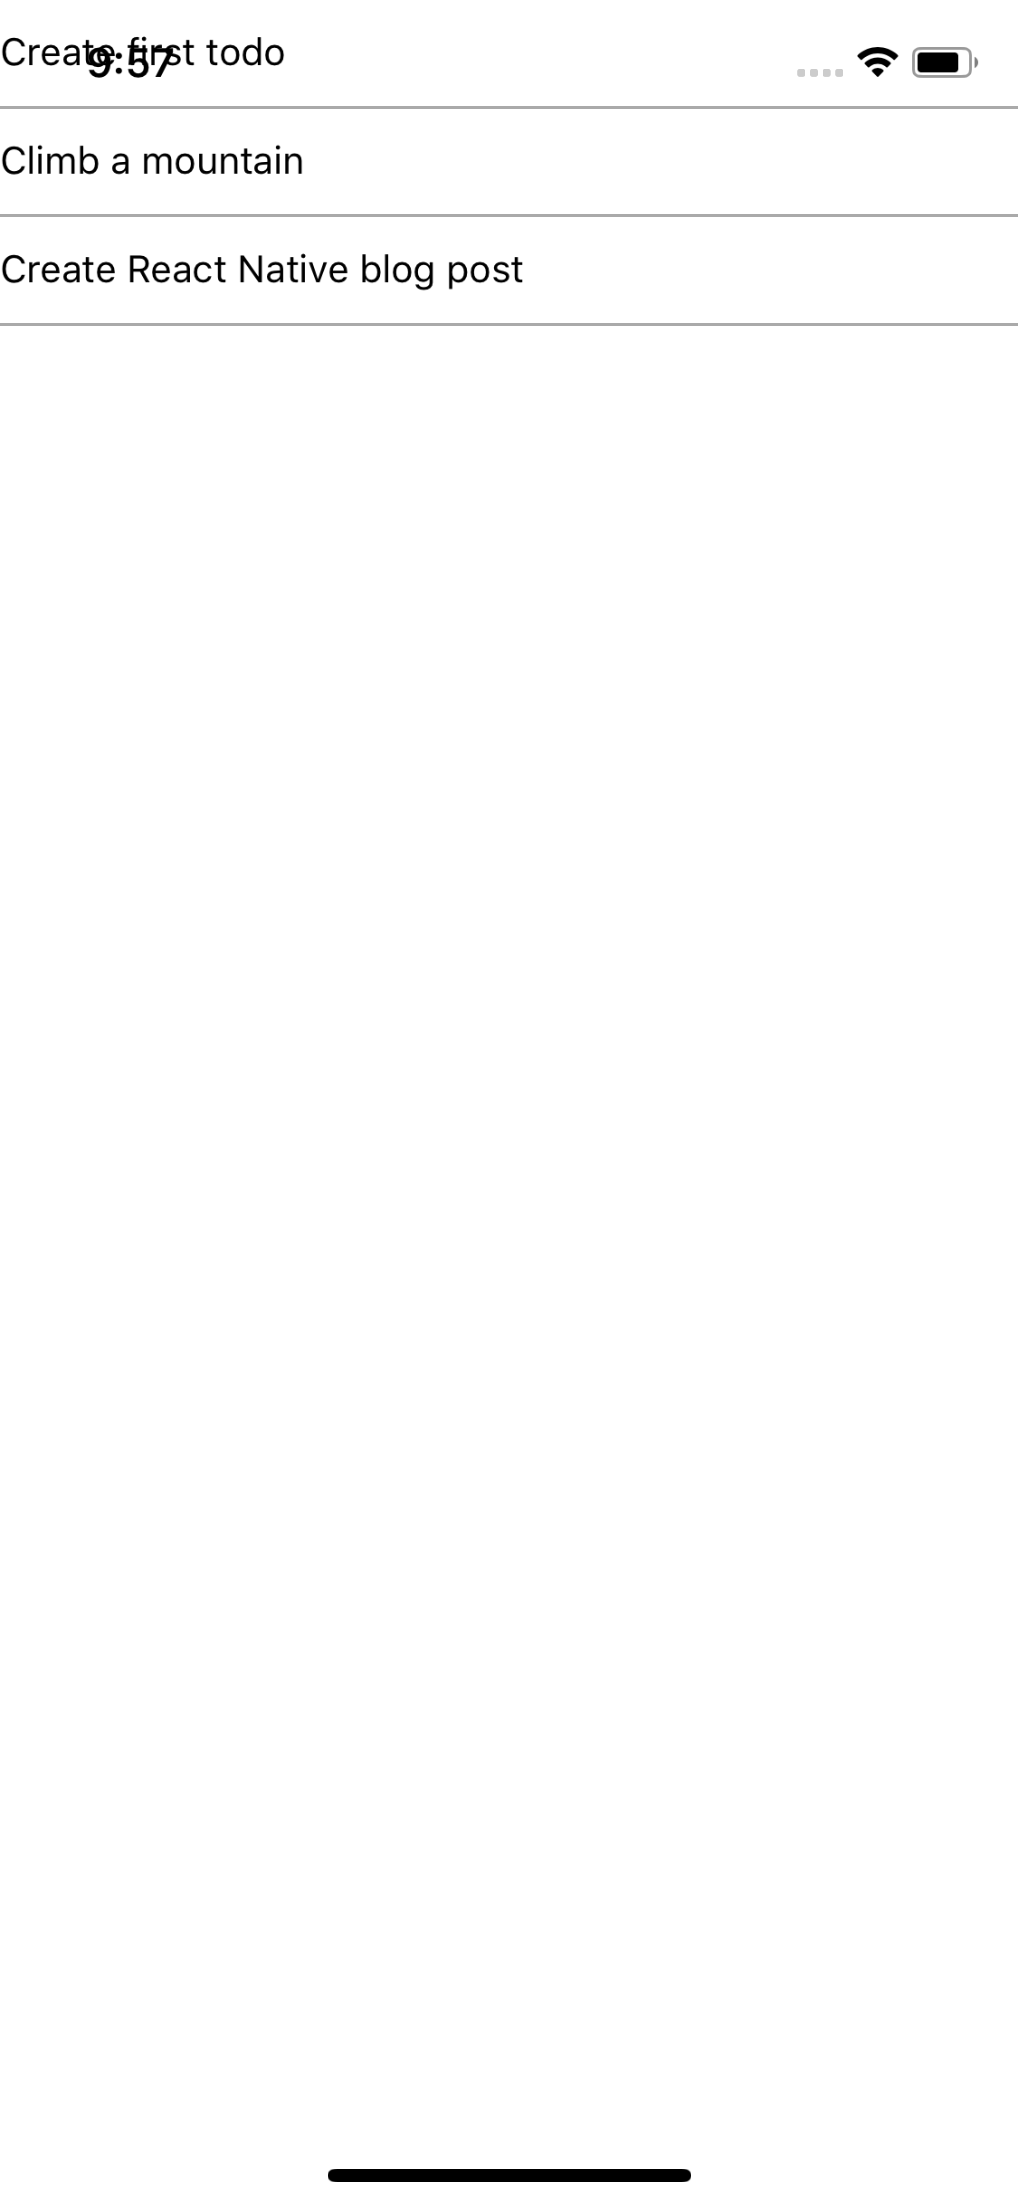
A clever observer may notice that our items are going under the action bar on both OSs. This is definitely not the desired behavior, so we’ll take care of it before moving on. There are a couple ways to do this, but since we know we’ll eventually want navigation we’ll add the basic nav structure now and use the navigation bar to adjust our content’s position.
We’re going to use React Navigation to handle our navigation. There are other options available, but this is powerful enough for our needs while staying easy to use. The first thing we need to do is install the react-navigation package
npm install --save react-navigationNext we’re going need to create our home screen. This is going to be almost the same as our App.js file, so just rename that to TodoListScreen.js and change the class name to TodoListScreen. We’ll also add a title to a new static object, navigationOptions, so our nav bar knows what to display:
...
export default class TodoListScreen extends React.Component {
  static navigationOptions = {
      title: 'Todo List',
  };
...
Now create a new App.js. Here we’ll create our initial navigation structure. Since we only have one screen, this will be very simple:
import React from 'react';
import { StyleSheet, Text, View } from 'react-native';
import TodoListScreen from './TodoListScreen';
import { createStackNavigator } from 'react-navigation';

export default createStackNavigator({
  Home: TodoListScreen ,
});
And that’s it! Now when we run our app it looks a little better:
The last thing we want to do before moving on to actions is let the user know which items are active and which have been completed. We’ll do this by splitting our list into sections, displaying active items first and completed items second. This is very easy to do from our current setup, and can be completed with only a few changes to TodoListComponent. We need to
- Change our FlatList to a SectionList
- Split our todoItems array into an array of sections
- Tell the SectionList how to display our section headers
import React from 'react';
import { StyleSheet, SectionList, Text } from 'react-native';
import TodoItemComponent from './TodoItemComponent';

export default function TodoList({todoItems, ...props}) {
  let activeItems = todoItems.filter(i => !i.isCompleted);
  let completedItems = todoItems.filter(i => i.isCompleted);
  let sections = [
    { title:"Active", data:activeItems },
    { title:"Completed", data:completedItems},
  ];

  return (
    <SectionList style={styles.container}
      sections={sections}
      renderItem={({item, index, section}) => <TodoItemComponent {...item} />}
      renderSectionHeader={({section: {title}}) => (
        <Text style={styles.sectionHeader}>{title}</Text>
      )}
    />
  );
}

const styles = StyleSheet.create({
  container: {
    flex: 1,
    backgroundColor: '#fff',
  },
  sectionHeader: {
    fontWeight: 'bold',
    backgroundColor: '#eee',
    paddingTop: 5,
    paddingBottom: 5,
  },
});
Now when we run the app we see our items split apart based on their active vs completed status.
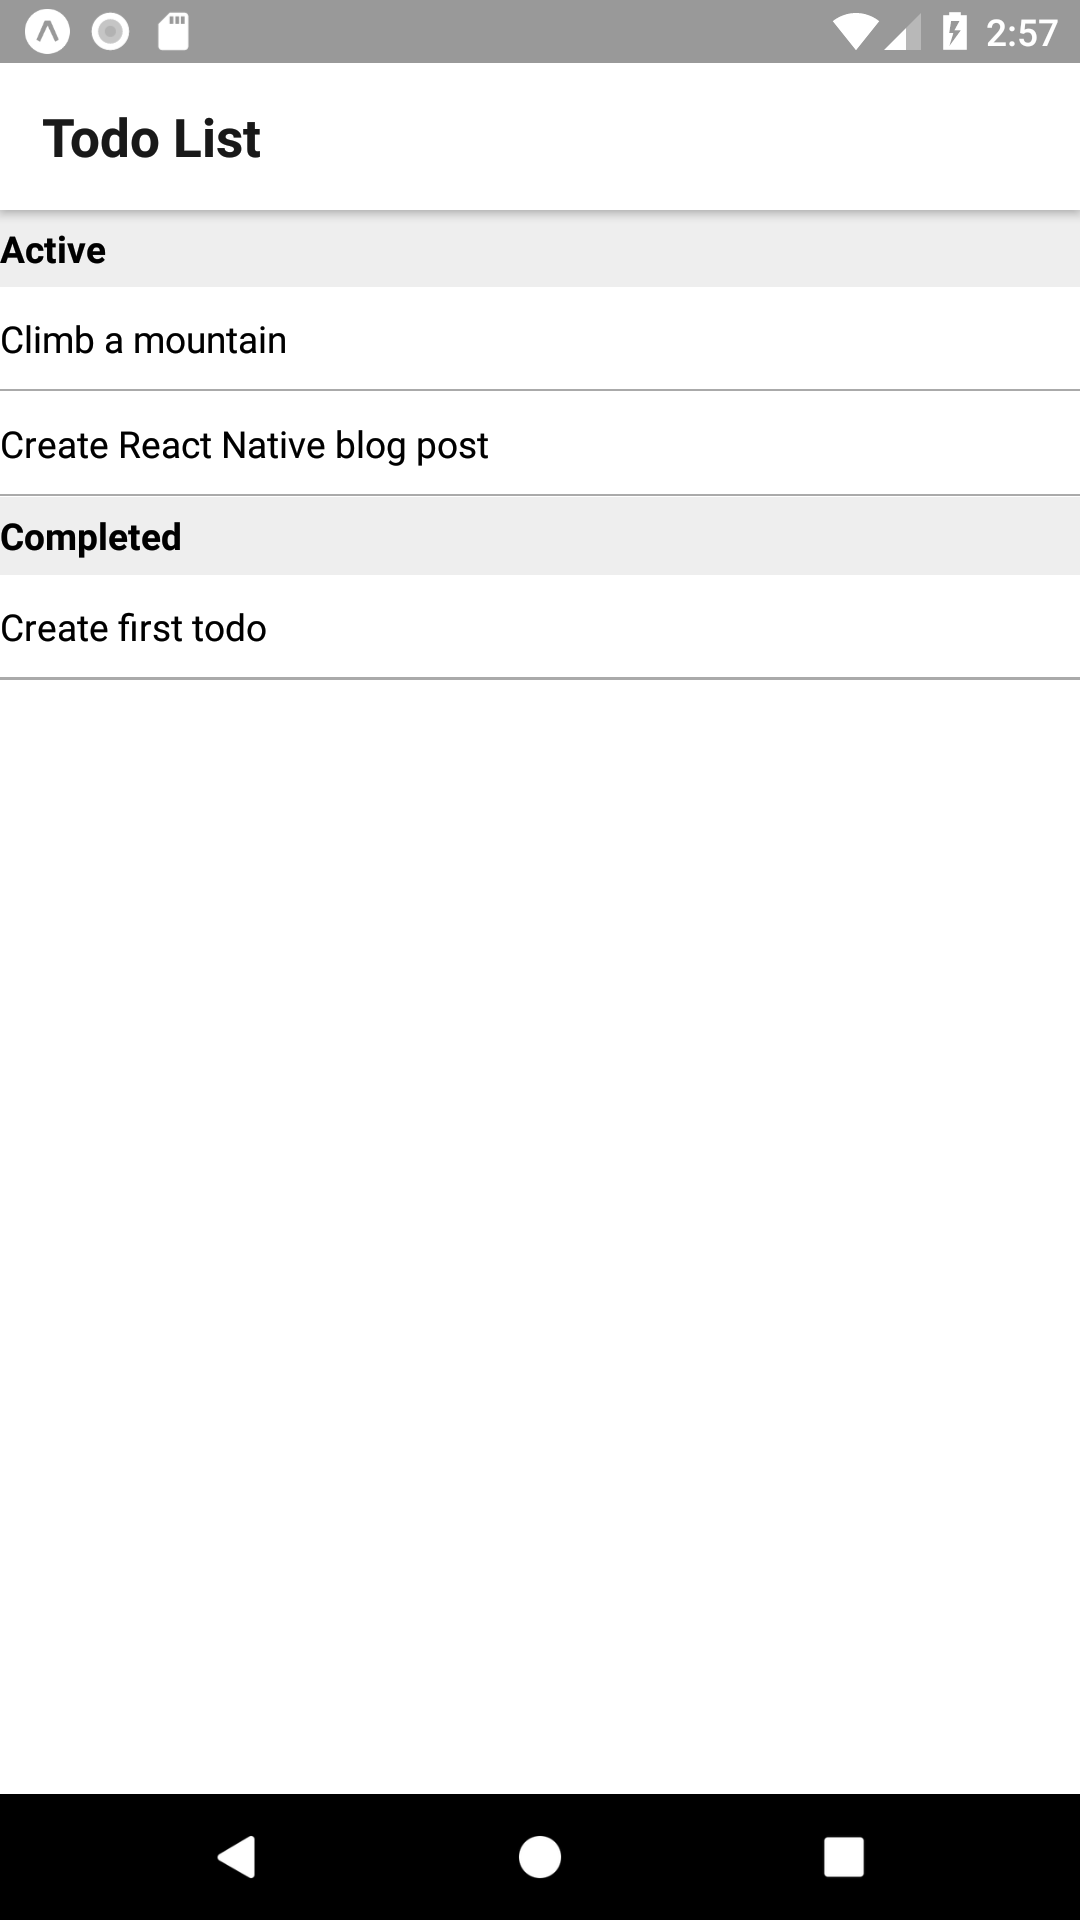
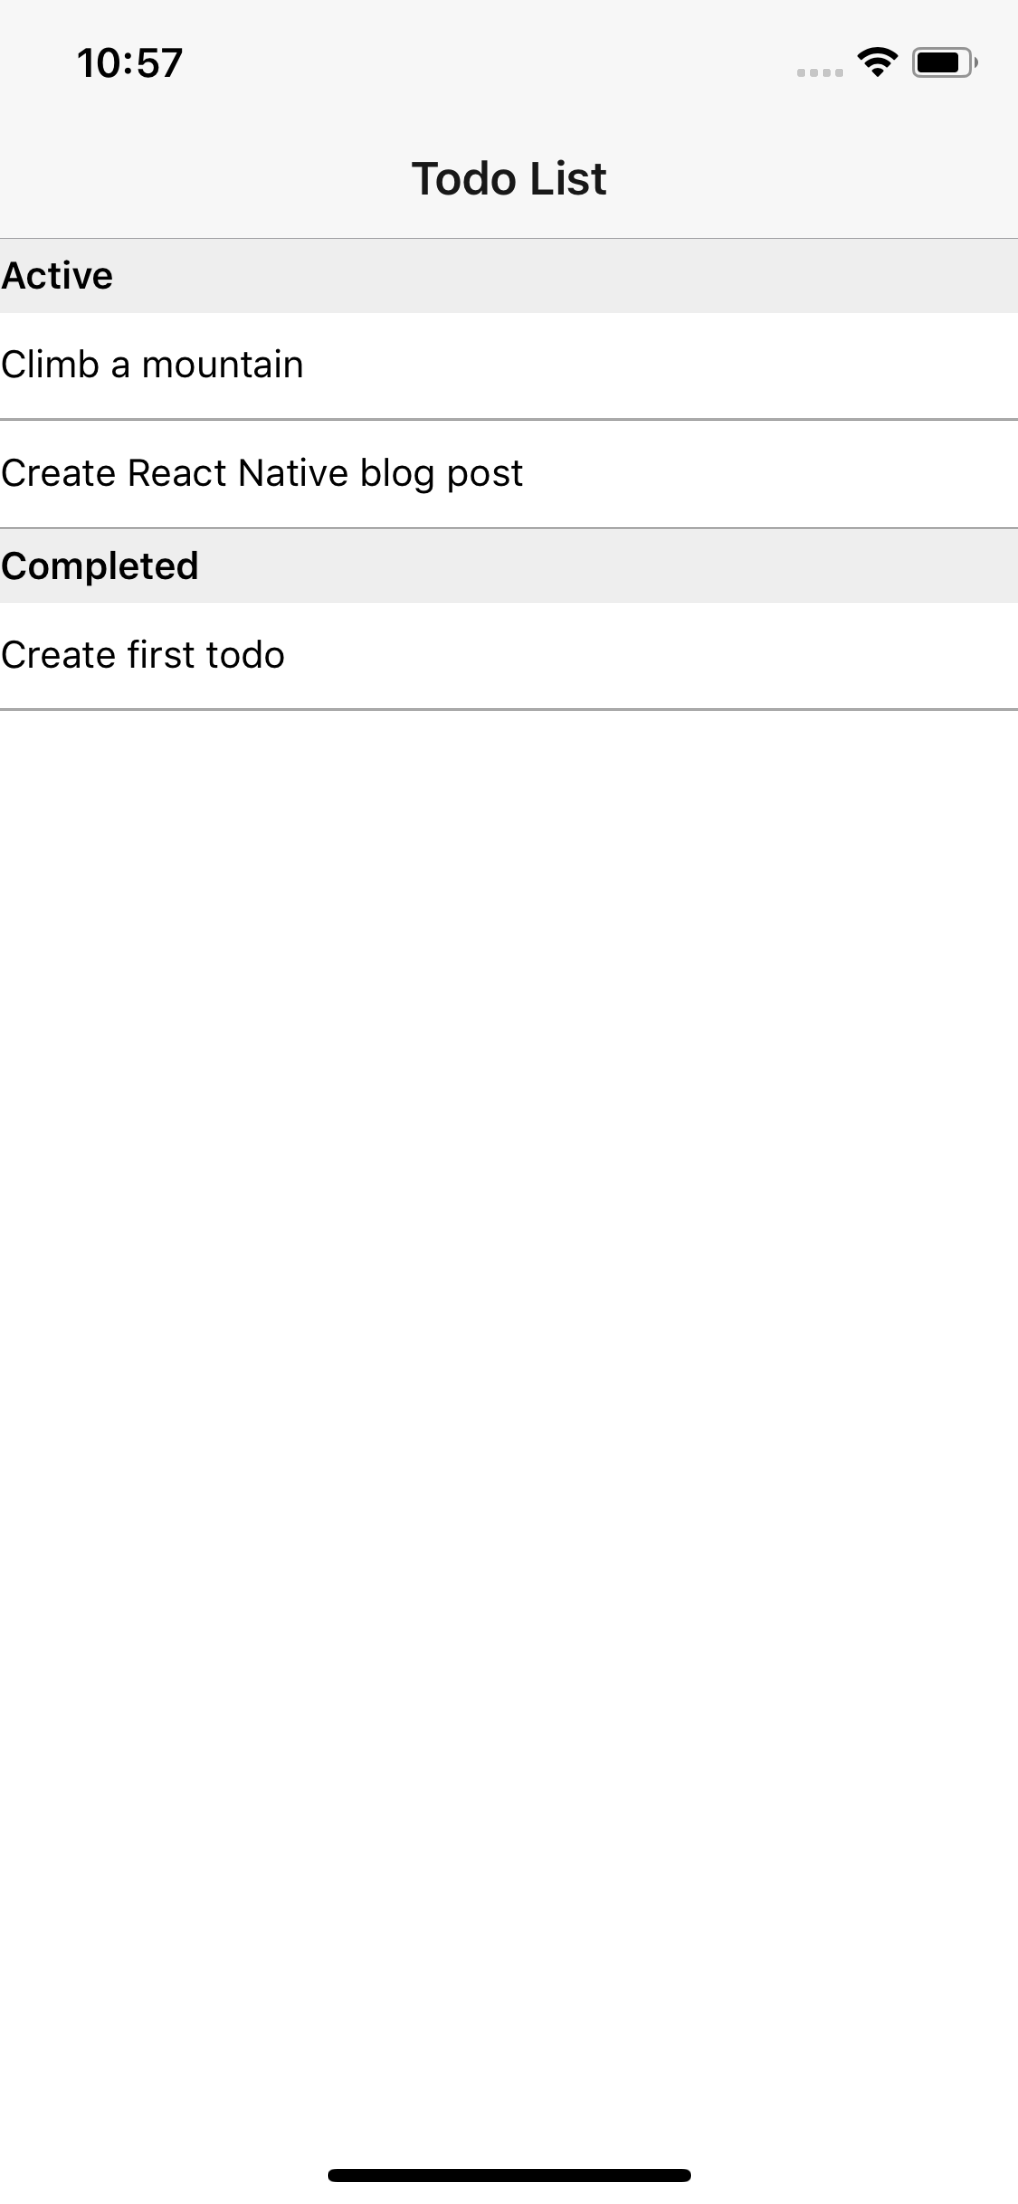
The section headers follow platform norms when scrolling. If you add enough todo items, you’ll notice that iOS uses sticky headers and Android scrolls the headers off the screen immediately.
Now we’re ready to start adding user interactions!
Completing, Uncompleting and Deleting Items
As much fun as it is to stare at a static list of Todos, our user probably wants to edit the list. We’ll start by allowing them to complete, uncomplete, and delete items from the existing list.
The first thing we want to do is add something the user can interact with. SectionList doesn’t natively give us a way to add context actions to our items, so we’ll just add custom buttons.
There are 3rd party libraries that handle this, but I want to keep outside dependencies to a minimum for this post
We need to create a new component for our interaction options. We’re going to use React Native’s TouchableHighlight to create button-like components that we can style to make the choices obvious for the user. Since these will only be used by our TodoItemComponent, we can add our code directly to TodoItemComponent.js.
...
import { StyleSheet, Text, View, TouchableHighlight } from 'react-native';

function TodoItemActionButton({title, isDestructive, ...props}) {
  return (
    <TouchableHighlight style={ isDestructive ? styles.destructiveActionButton : styles.actionButton }>
      <Text style={styles.actionButtonText}>{title}</Text>
    </TouchableHighlight>
  );
}
...
const styles = StyleSheet.create({
  ...
  actionButton: {
    backgroundColor: '#00f',
    display: 'flex',
    justifyContent:'center',
  },
  destructiveActionButton: {
    backgroundColor: '#f00',
    display: 'flex',
    justifyContent:'center',
  },
  actionButtonText: {
    color: '#fff',
    paddingLeft: 10,
    paddingRight: 10,
  },
});
Now we want to use our TodoActionButton in our TodoItemComponent. This is mostly straightforward, but we also need to make some style changes to keep things looking correct.
...
    <Text style={styles.todoTitle}>{title}</Text>
    <TodoItemActionButton title={isCompleted ? "Uncomplete" : "Complete"}
        isDestructive={false} />
    <TodoItemActionButton  title="Delete" isDestructive={true} />
...
const styles = StyleSheet.create({
  ...
  content: {
    flexGrow: 1,
    alignItems: 'stretch',
    display: 'flex',
    flexDirection: 'row',
    justifyContent: 'flex-start',
  },
  ...
  todoTitle: {
    flexGrow: 1,
    alignSelf: 'center',
  },
...
When we run the app now we’ll see complete, uncomplete, and delete buttons!
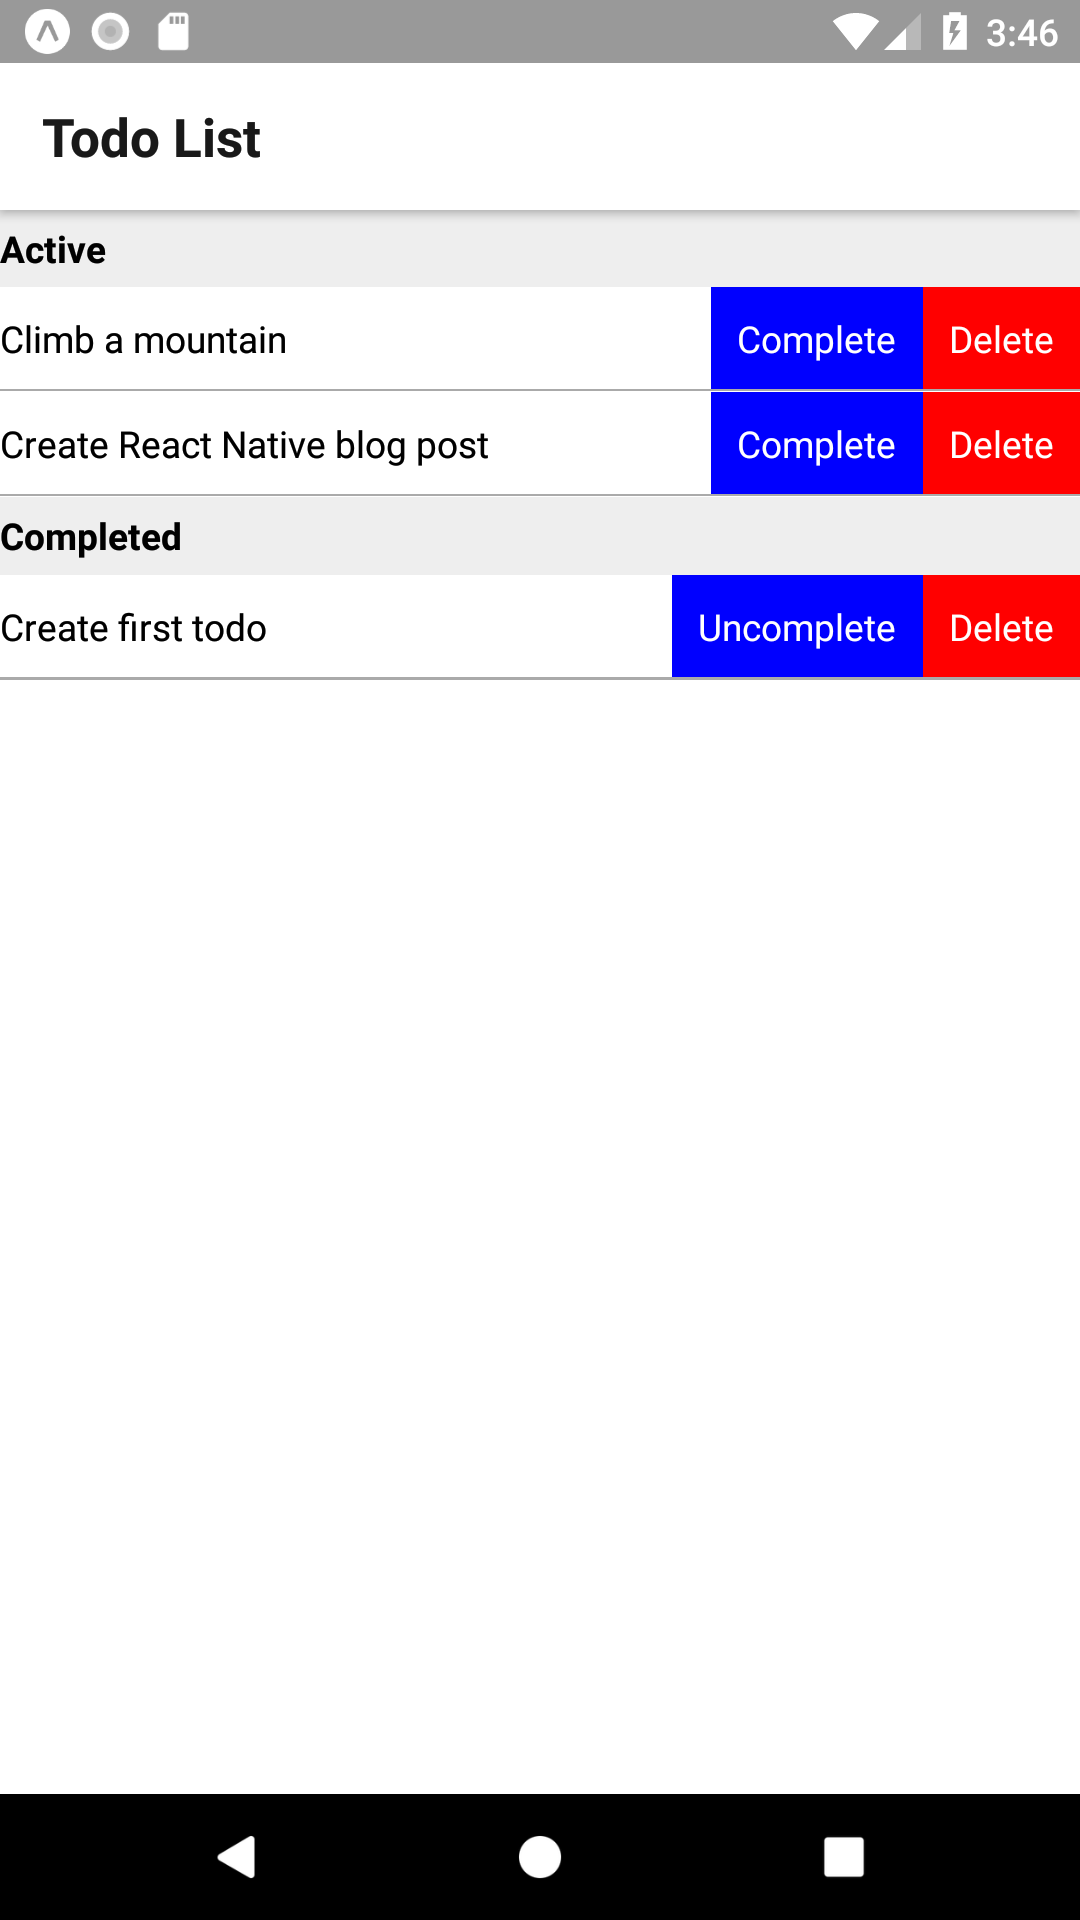
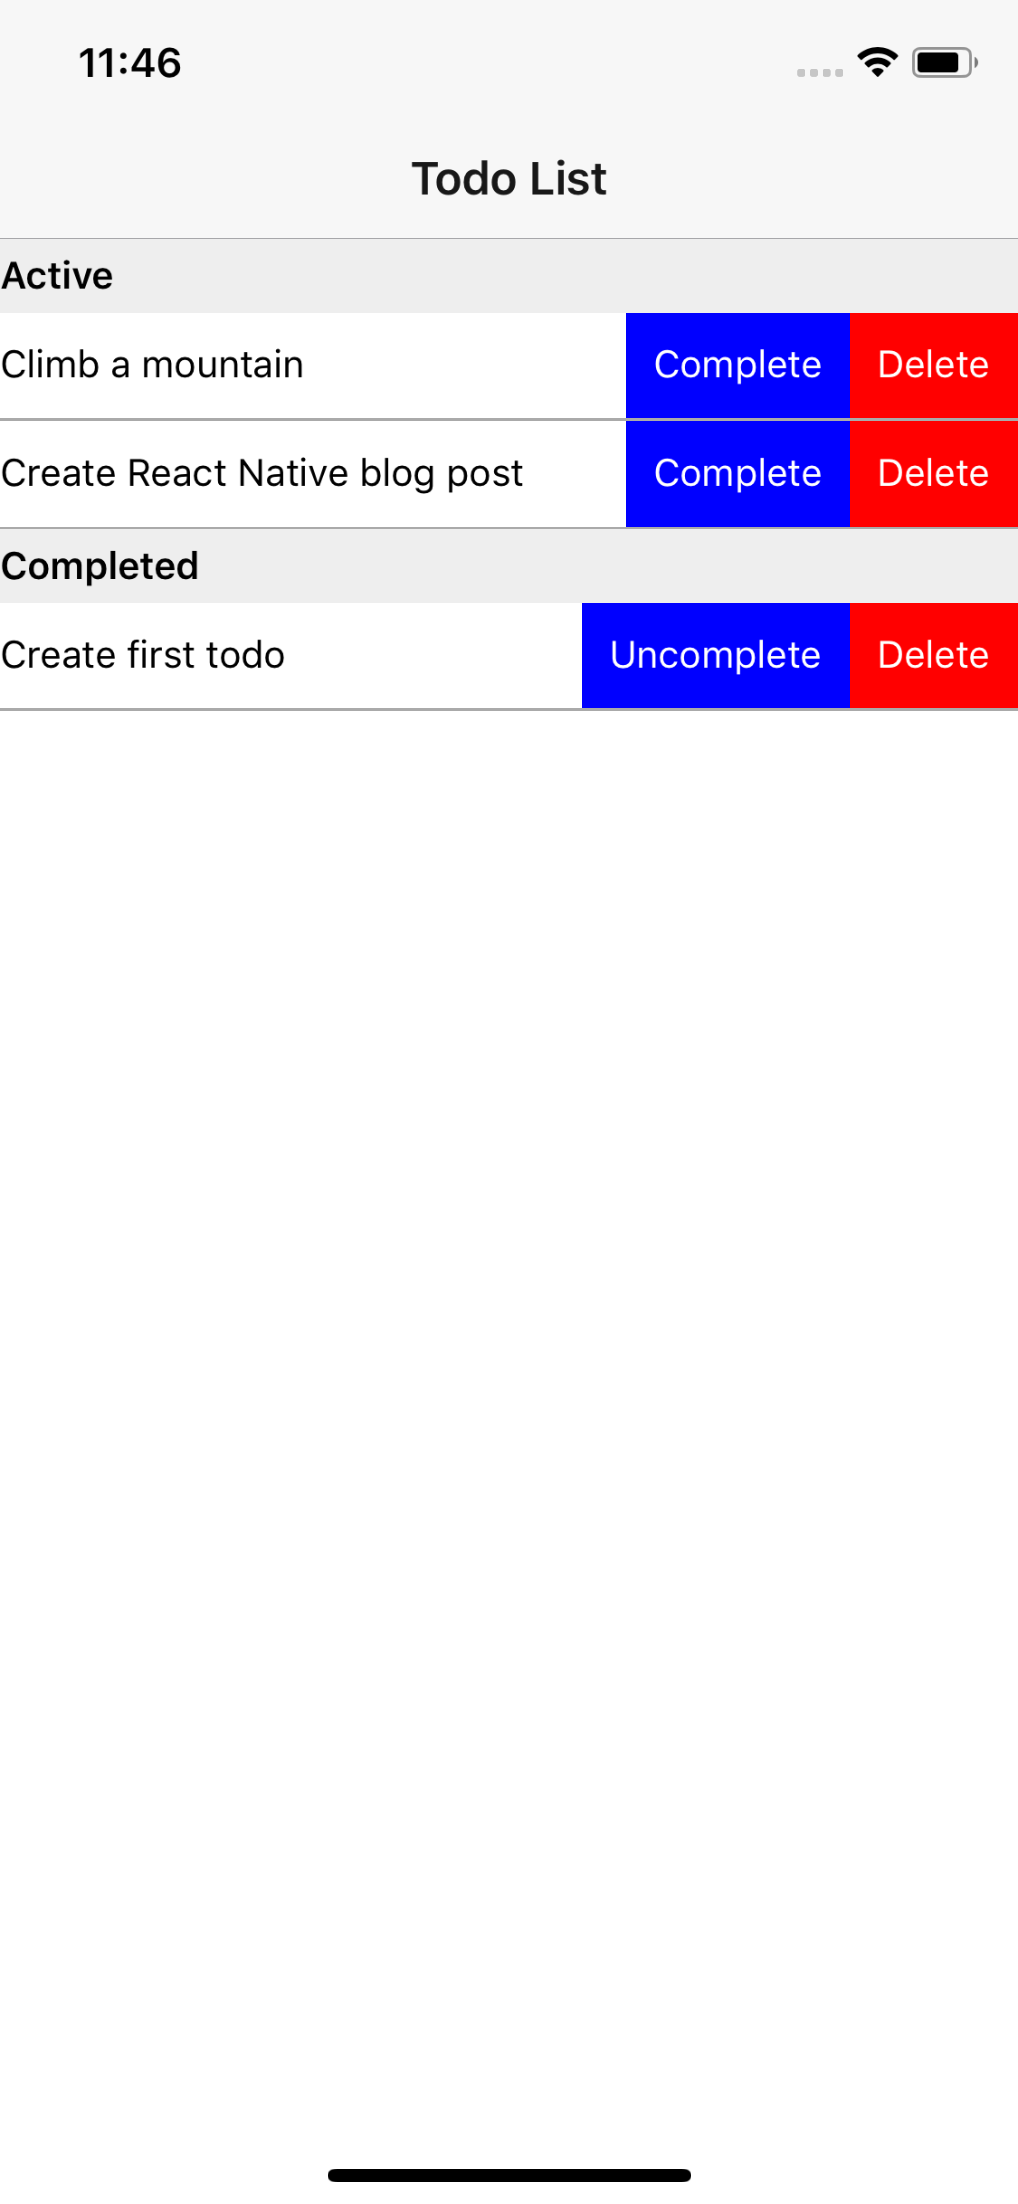
Of course, our buttons don’t do anything yet. We’ll start by implementing our complete and uncomplete buttons. This is an interesting thing to think about if it’s your first time using React: since our todo list (state) is held up at the TodoListScreen level, that’s where we want to handle changing our data. We’ll do this by adding our list to the component’s state and creating a new function that alters the state when called.
...
  constructor(props) {
    super(props);
    this.state = {todoItems};

    // This binding is necessary to make `this` work in the callback
    this.toggleItemCompleted = this.toggleItemCompleted.bind(this);
  }
  toggleItemCompleted(itemKey) {
    this.setState((prevState, props) => {
      // Use a temporary variable to avoid directly modifying state
      const tempTodoItems = prevState.todoItems;
      const toggledItemIndex = tempTodoItems.findIndex(item => item.key === itemKey);
      tempTodoItems[toggledItemIndex].isCompleted =
        !tempTodoItems[toggledItemIndex].isCompleted;
      return {todoItems: tempTodoItems};
    });
  }
  render() {
...
Now we need to pass this function down through our component hierarchy until we can add it to our button.
TodoListScreen
...
  <TodoList todoItems={this.state.todoItems} onToggleItemCompleted={this.toggleItemCompleted} />
...
TodoListComponent
...
export default function TodoList({todoItems, onToggleItemCompleted, ...props}) {
...
renderItem={({item, index, section}) => <TodoItemComponent {...item}
                                        itemKey={item.key}
                                        onToggleCompleted={onToggleItemCompleted} />}
...
Note: We also passed itemKey here. ‘key’ is a keyword for SectionList and is not automatically passed with …item, and we need the key to identify which item is being edited
TodoItemComponent.TodoItem
...
export default function TodoItem({itemKey, title, isCompleted,
                                    onToggleCompleted, ...props}) {
...
        <TodoItemActionButton title={isCompleted ? "Uncomplete" : "Complete"}
          isDestructive={false}
          onPress={() => onToggleCompleted(itemKey)} />
        <TodoItemActionButton title="Delete"
          isDestructive={true}
          onPress={() => {}/*TODO*/} />
...
TodoItemComponent.TodoItemActionButton
...
function TodoItemActionButton({title, isDestructive, onPress, ...props}) {
...
    <TouchableHighlight
      style={ isDestructive ? styles.destructiveActionButton : styles.actionButton }
      onPress={onPress}>
...
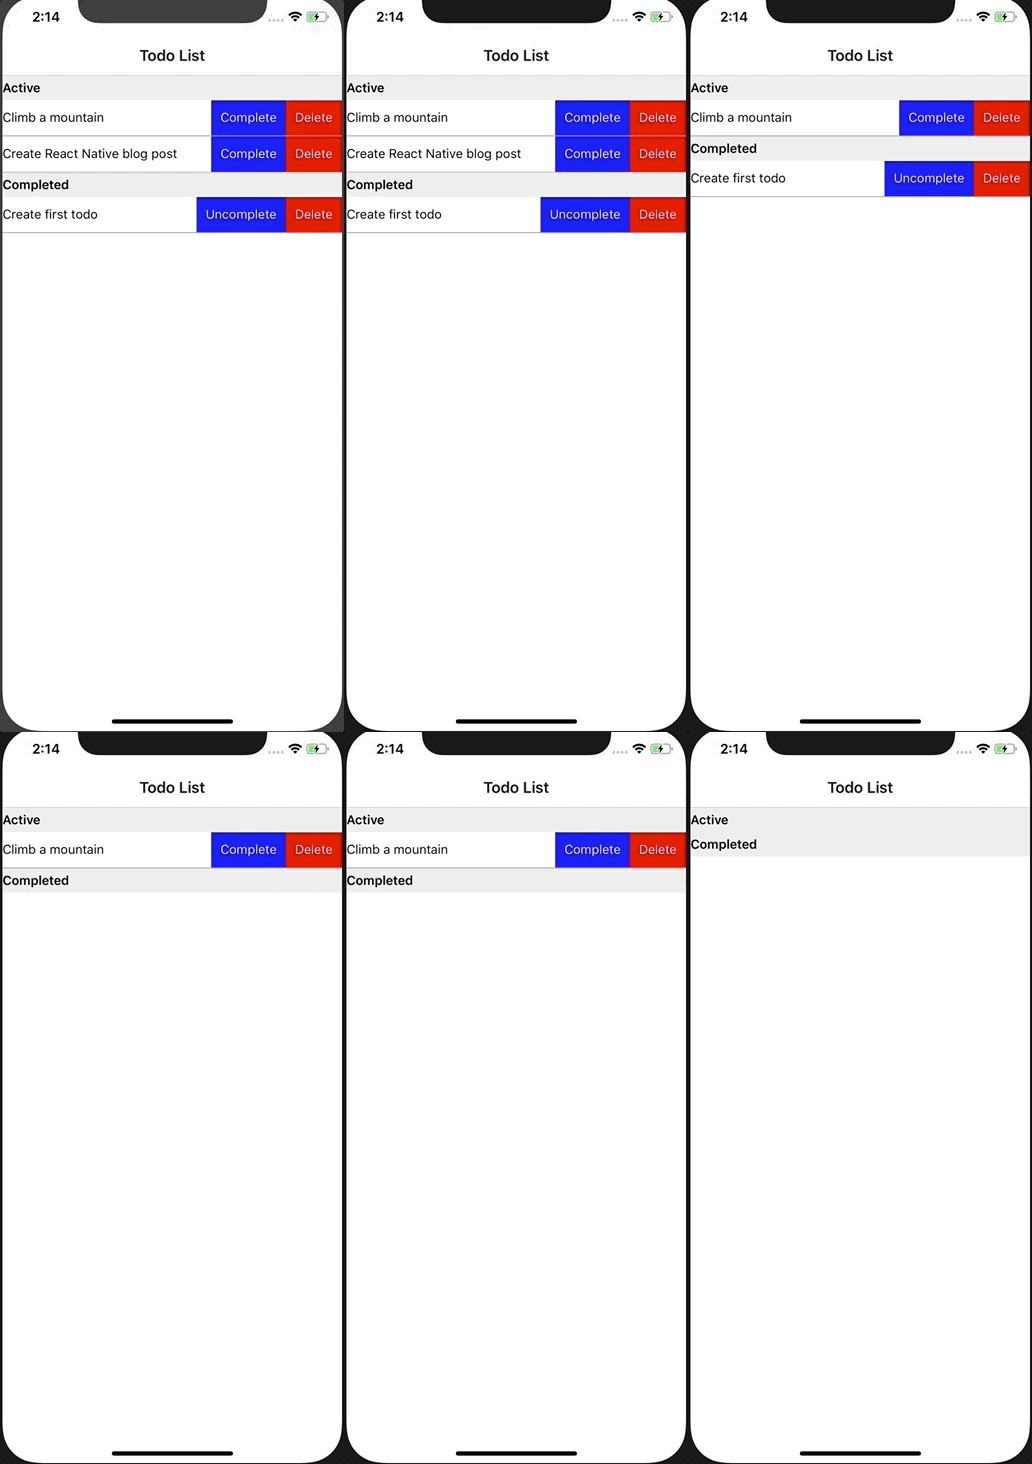
With that flury of changes, we’ve enabled Complete and Uncomplete functionality.
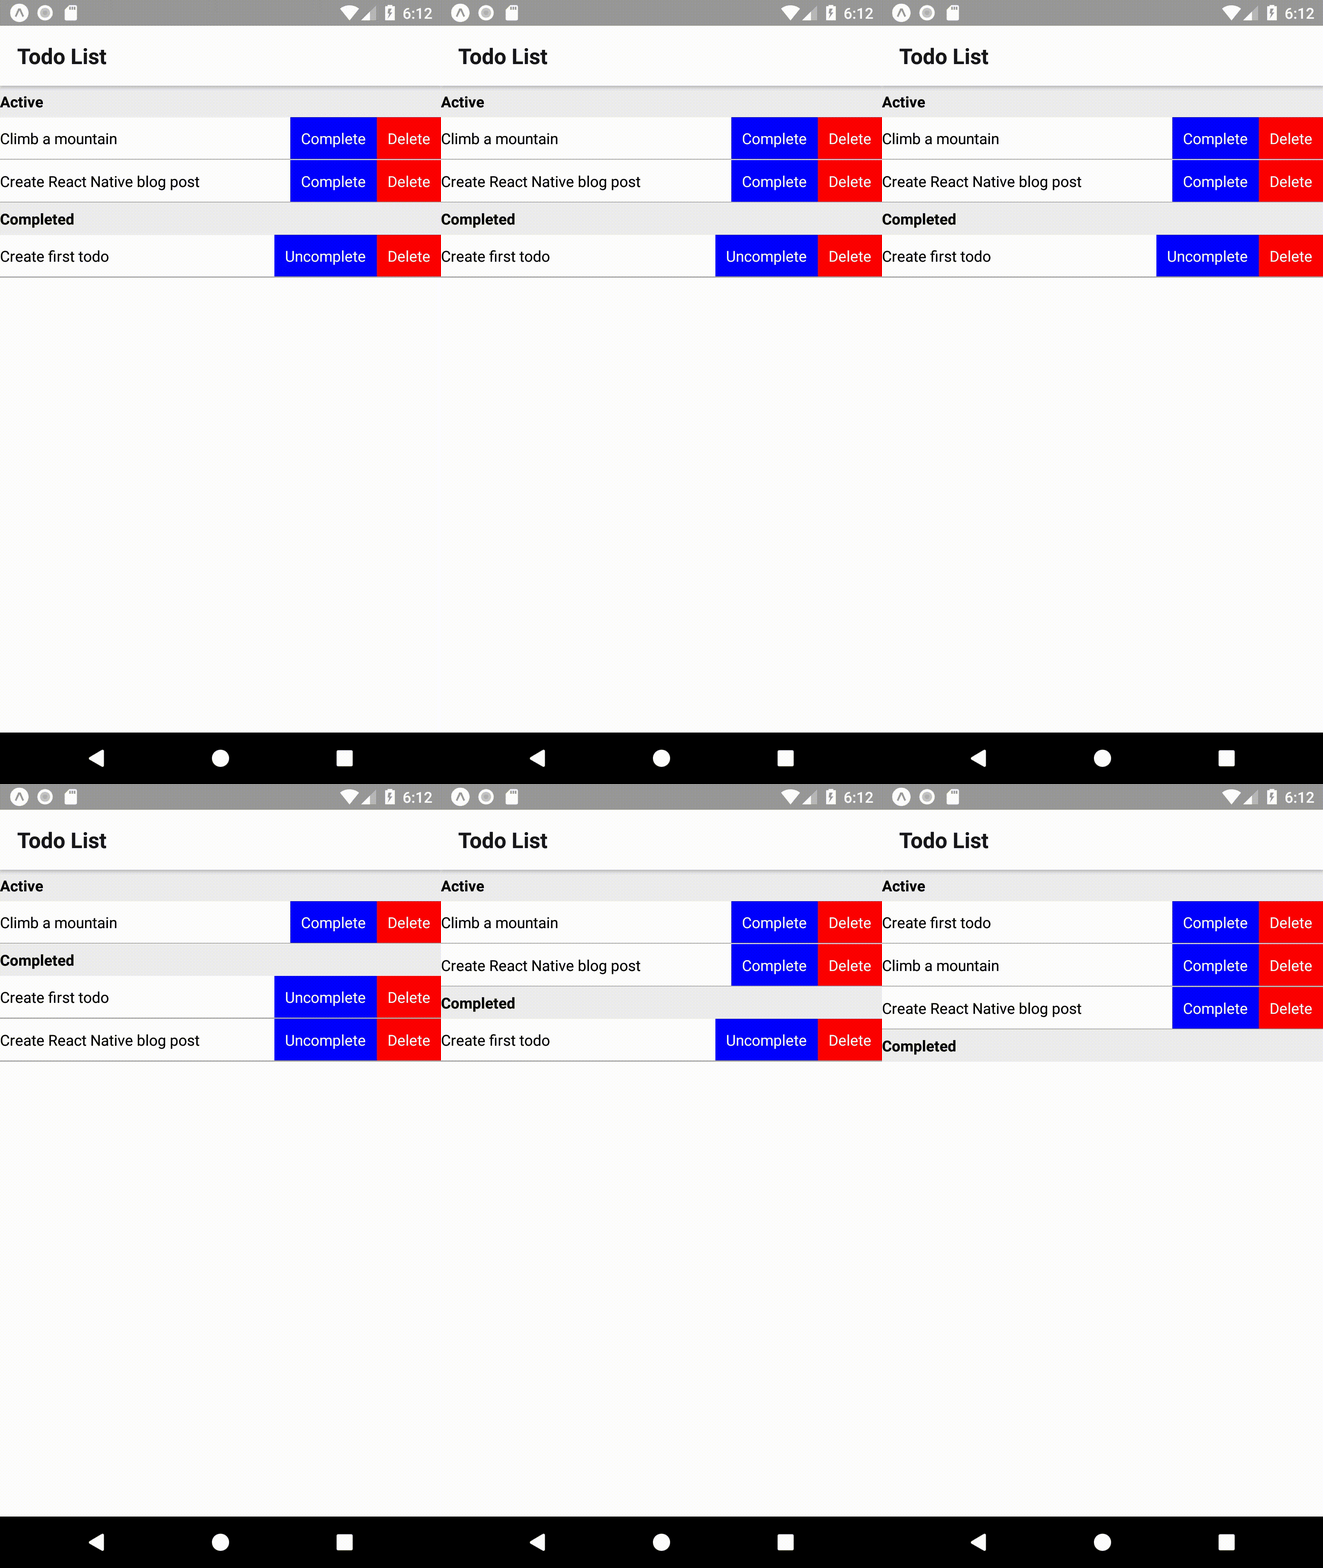
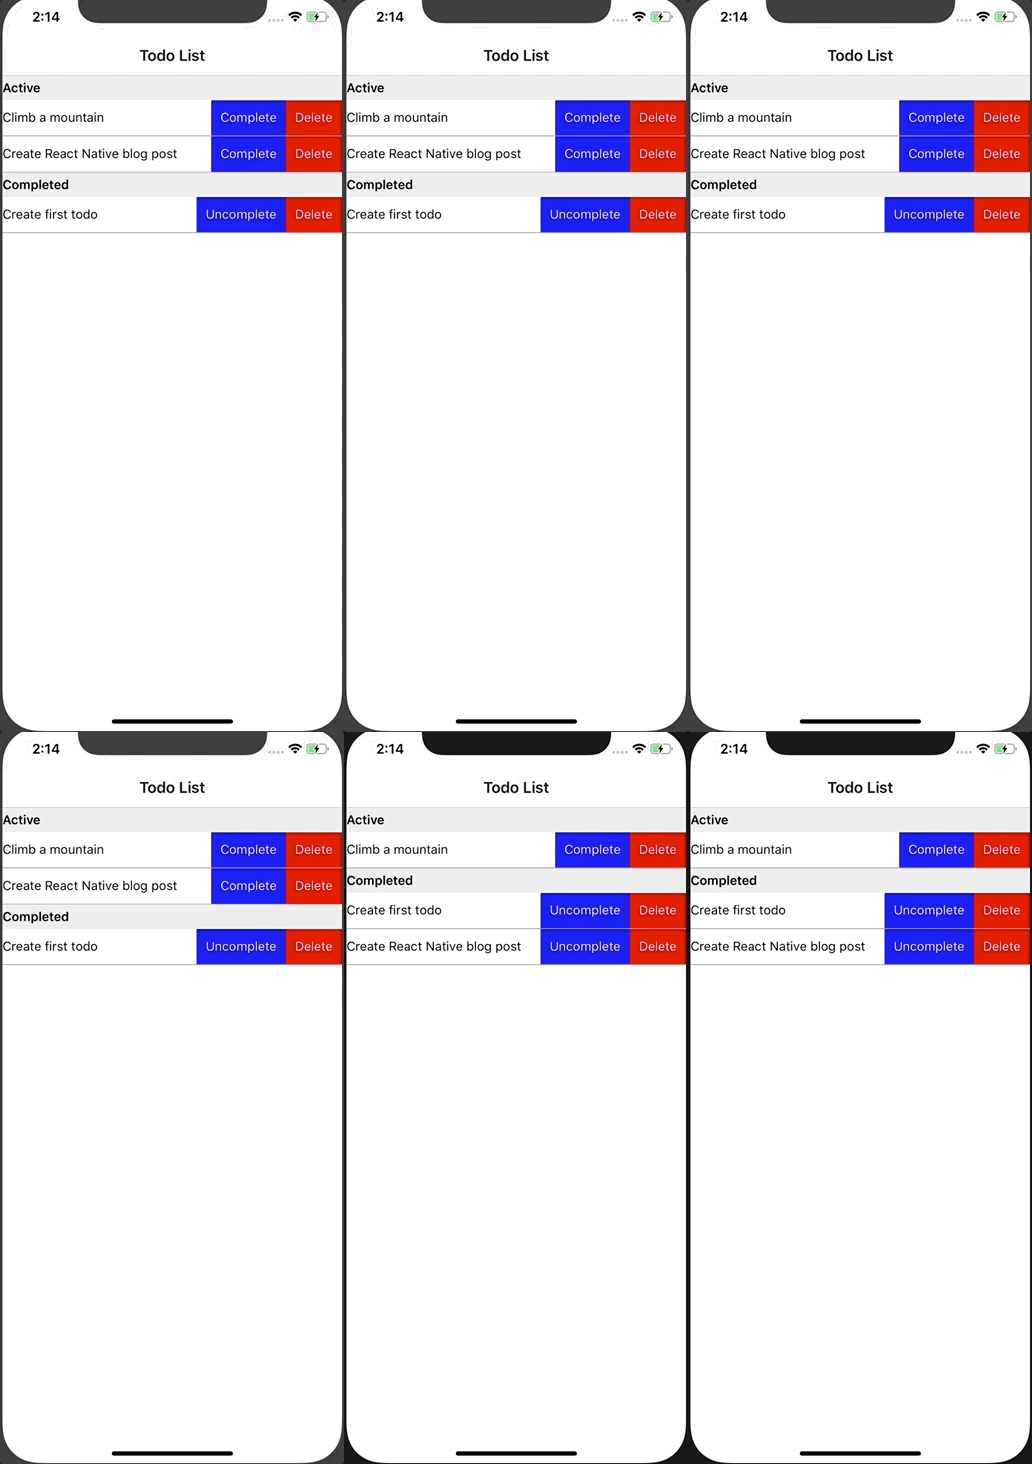
All of that work also paved the way to add Delete functionality as well. The steps to do this are exactly the same as for Complete/Uncomplete, so I’m just going to show the code changes without repeating any description. The one thing we don’t need to change this time around is the TodoItemActionButton. We were clever in our first implementation and made it generic enough to work with any onPress function.
TodoListScreen
...
constructor(props) {
  ...
  this.deleteItem = this.deleteItem.bind(this);
}
...
deleteItem(itemKey) {
  this.setState((prevState, props) => {
    // Use a temporary variable to avoid directly modifying state
    let tempTodoItems = prevState.todoItems;
    const deletedItemIndex = tempTodoItems.findIndex(item => item.key === itemKey);
    tempTodoItems.splice(deletedItemIndex, 1);
    return {todoItems: tempTodoItems};
  });
}
...
  <TodoList todoItems={this.state.todoItems} onToggleItemCompleted={this.toggleItemCompleted}
    onDeleteItem={this.deleteItem} />
...
TodoListComponent
...
export default function TodoList({todoItems, onToggleItemCompleted, onDeleteItem, ...props}) {
...
renderItem={({item, index, section}) => <TodoItemComponent {...item}
                                        itemKey={item.key}
                                        onToggleCompleted={onToggleItemCompleted}
                                        onDeleteItem={onDeleteItem} />}
...
TodoItemComponent.TodoItem
...
export default function TodoItem({itemKey, title, isCompleted,
                                    onToggleCompleted, onDeleteItem, ...props}) {
...
        <TodoItemActionButton title={isCompleted ? "Uncomplete" : "Complete"}
          isDestructive={false}
          onPress={() => onToggleCompleted(itemKey)} />
        <TodoItemActionButton title="Delete"
          isDestructive={true}
          onPress={() => {onDeleteItem(itemKey)} />
...
And now the user can delete items from their list!
We only have two pieces of functionality remaining to finish our app: persistence and ‘add item’. We’re going to work on persistence next so we can navigate between screens without losing data.
Persisting the Todo List
We’re going to use a very simple form of persistence for this application, AsyncStorage. AsyncStorage is a key-value storage mechanism provided directly in the React Native library and has a simple API. While easy to use for a small application, it has drawbacks from both performance and design perspectives. You’ll likely want to look into other solutions for more complicated applications.
The first thing we need to do is initialize our storage and read our TodoList from it. Since this is a sample app, we’ll also populate our todo list with data anytime it’s empty. To do this we’ll edit TodoListScreen by adding a new method, initializeTodoList, where we’ll handle the basic data logic.
In a more complex application this may make more sense at a higher level, for example in App.js. However, for this example I find it easier to keep this logic contained in as few files as practical
...
import { StyleSheet, Text, View, AsyncStorage } from 'react-native';
...
const initialTodoItems = [ // Renamed to better reflect the new usage
...
  constructor(props) {
    super(props);

    this.state = { todoItems: [] }; // Set default empty list
    ...
    this.initializeTodoList = this.initializeTodoList.bind(this);

    this.initializeTodoList();
  }
  async initializeTodoList() {
    let todoItems = initialTodoItems.slice(); // Start with a copy of our initial list

    // If there's already a saved list, use that instead
    const storedTodoItems = await AsyncStorage.getItem("todoList");
    if(storedTodoItems != null) {
      const storedTodoArray = JSON.parse(storedTodoItems);
      if(storedTodoArray.length) todoItems = storedTodoArray;
    }

    this.setState({todoItems: todoItems}
      , () => AsyncStorage.setItem("todoList", JSON.stringify(this.state.todoItems)));
  }
...
Next we want to update our toggleItemCompleted and deleteItem methods to save any changes the user makes. We can do this just by adding a callback to our setState calls.
...
  toggleItemCompleted(itemKey) {
    this.setState((prevState, props) => {
      ...
    }, () => AsyncStorage.setItem("todoList", JSON.stringify(this.state.todoItems)));
  }
  deleteItem(itemKey) {
    this.setState((prevState, props) => {
      ...
    }, () => AsyncStorage.setItem("todoList", JSON.stringify(this.state.todoItems)));
  }
...
And that’s it! Our application now persists any changes the user makes. You can see this by deleting or completing a todo and reloading the application (“R,R” on Android emulator, “⌘+R” on iOS simulator). If you delete all items, you can reset the initial list by reloading the application (if you want to remove this functionality, just adjust initializeTodoList to stop using initialTodoItems).
Adding Todo Items
And now we’ve made it to the last piece we’re going to implement for this application: Adding Items! We’re going to go through a couple steps to do this: Adding an ‘Add Todo’ Button, Wiring Up Navigation, Creating an Add Todo screen, and finally Implementing Add.
Adding the ‘Add Todo’ button is fairly straightforward. We’re just going to add a new Button element to TodoListScreen and adjust our styles to make the button always appear at the bottom of the screen:
...
import { StyleSheet, Text, SafeAreaView, Button, AsyncStorage } from 'react-native';
...
  render() {
    return (
      <SafeAreaView style={styles.container}>
        <TodoList todoItems={this.state.todoItems} onToggleItemCompleted={this.toggleItemCompleted}
          onDeleteItem={this.deleteItem} style={styles.todoList} />
        <Button title="Add Item" onPress={() => {}} />
      </SafeAreaView>
    );
  }
}

const styles = StyleSheet.create({
  container: {
    display: 'flex',
    flexGrow: 1,
    flexDirection: 'column',
  },
  todoList: {
    flexGrow: 1,
  },
});
You may notice that we’re using a SafeAreaView instead of just View. SafeAreaView handles the bottom and top margins needed on some iOS devices, like the iPhone X, for us without affecting other iOS or Android devices.
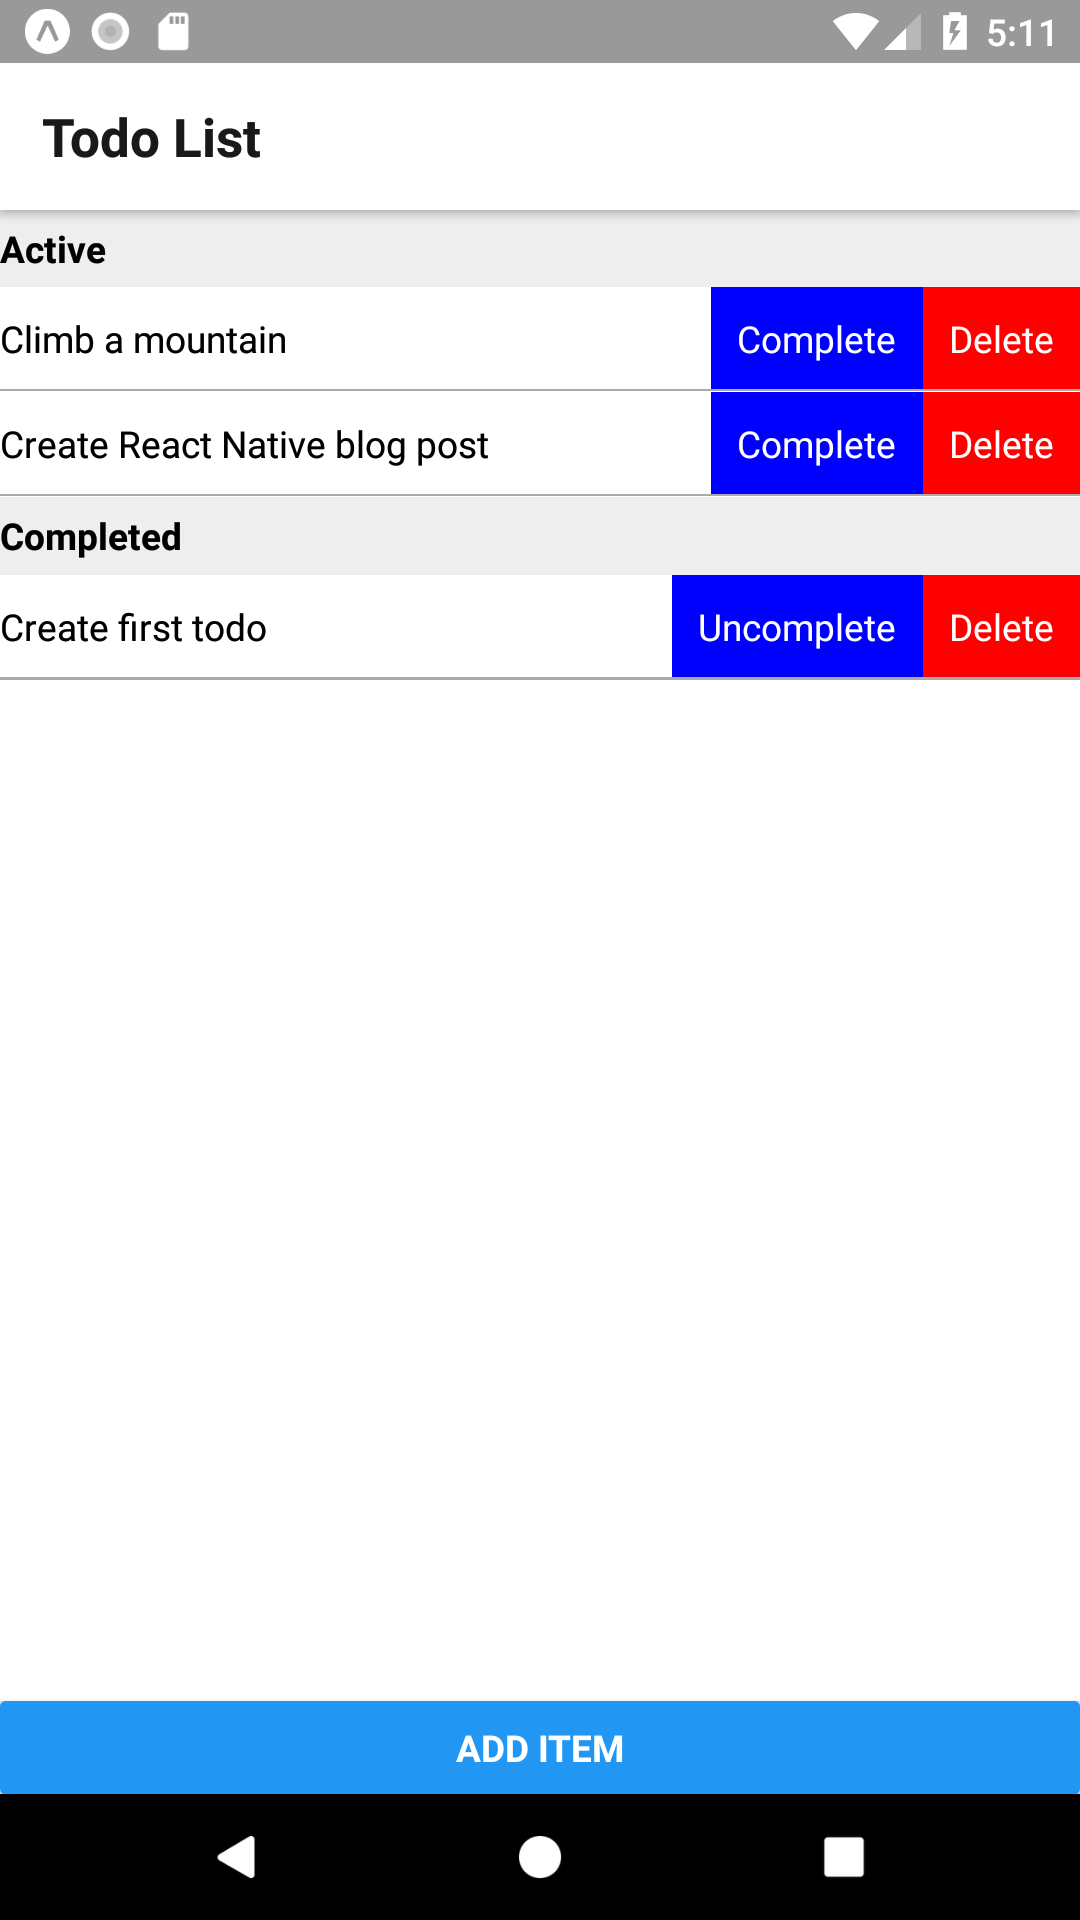
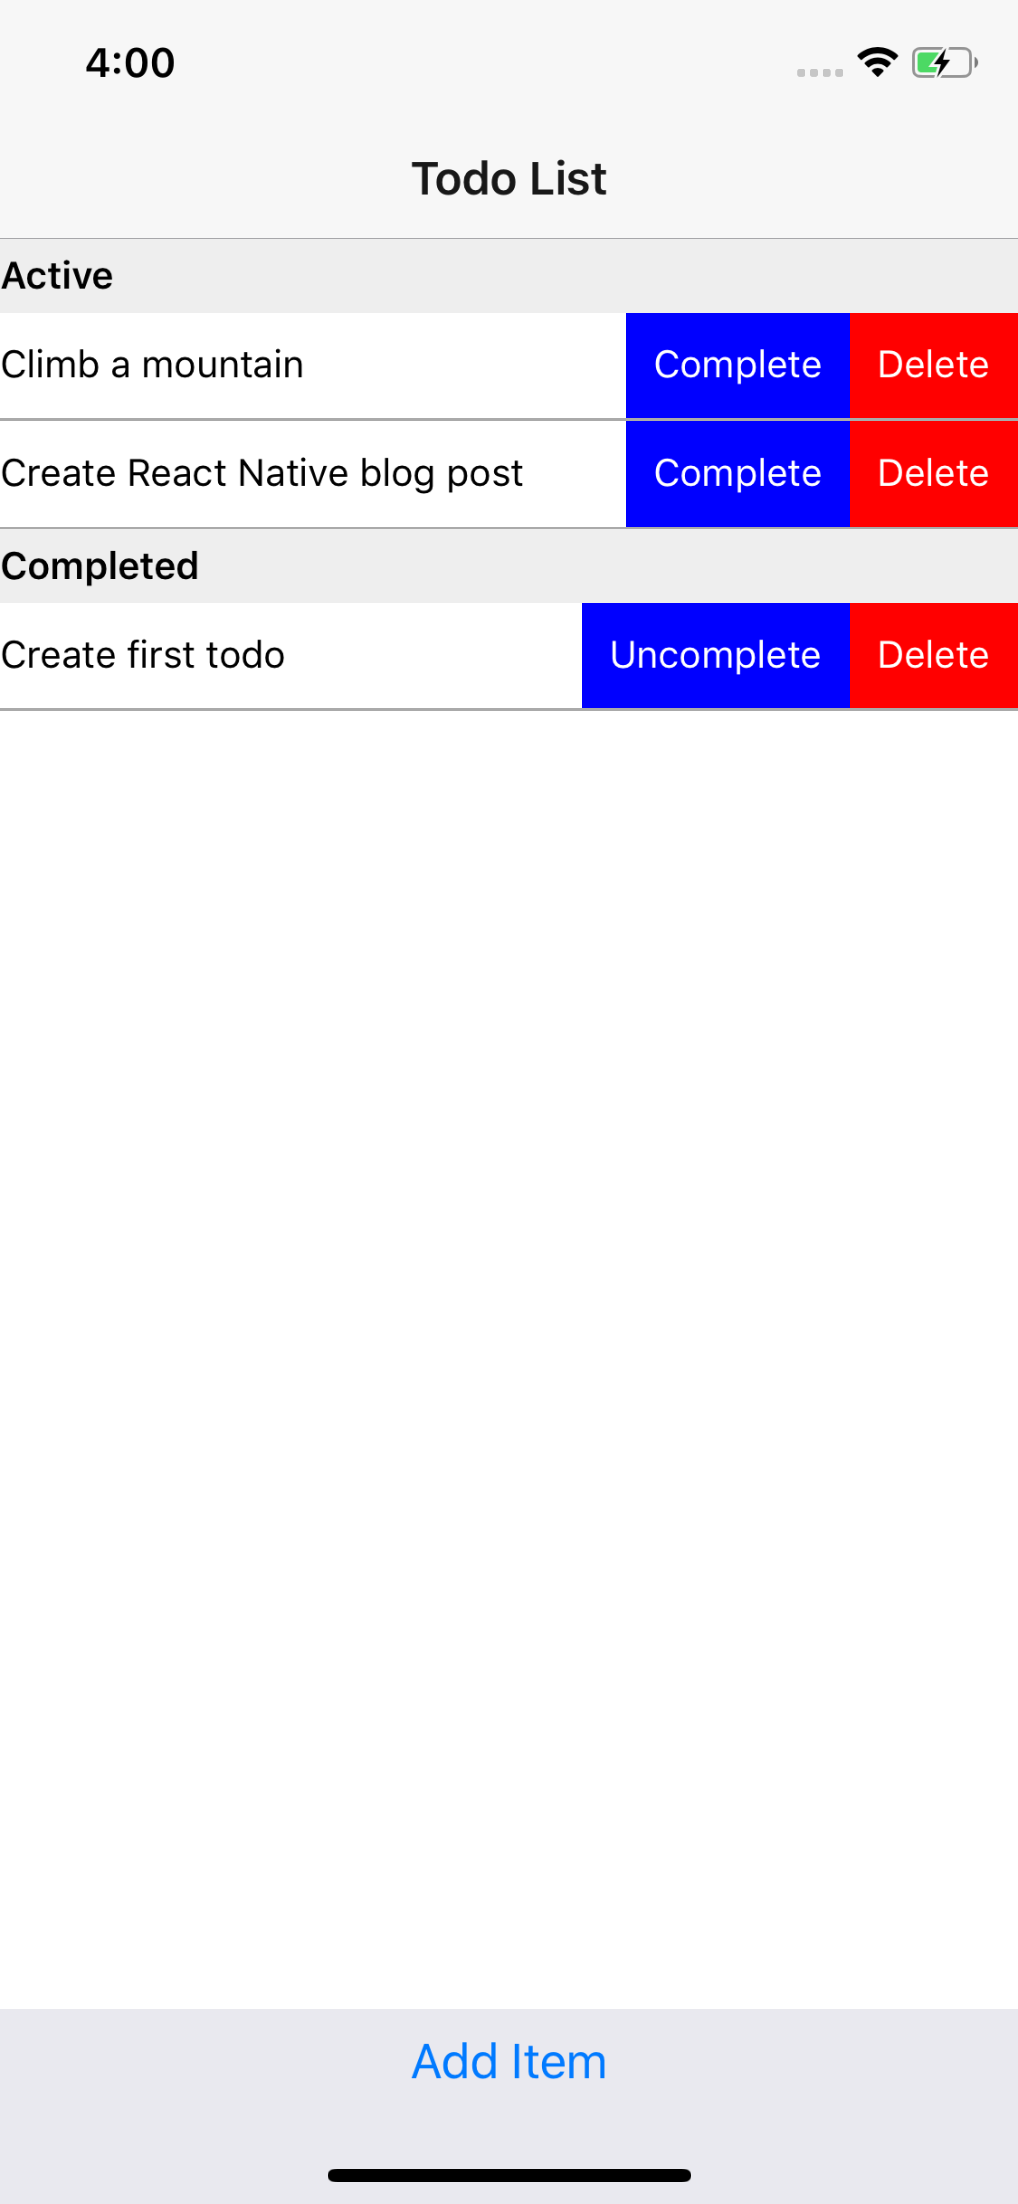
When we run this we’ll see our button at the bottom of the screen.
Next we’ll create a placeholder screen for Add Item. We’ll create a new file called AddTodoItemScreen.js and populate it with some hello-world-level code:
import React from 'react';
import { StyleSheet, View, Text } from 'react-native';

export default class TodoListScreen extends React.Component {
  static navigationOptions = {
      title: 'Add Todo Item',
  };
  render() {
    return (
      <View style={styles.container}>
        <Text>Welcome to Add</Text>
      </View>
    );
  }
}

const styles = StyleSheet.create({
  container: {
    display: 'flex',
    flexGrow: 1,
    flexDirection: 'column',
  },
});
In order to see this screen, we need to wire up our navigation. This involves changes to our App.js and TodoListScreen.js files. First we’ll add our new screen to the Stack Navigator in App.js.
...
import AddTodoScreen from './AddTodoItemScreen';
...
export default createStackNavigator({
  Home: TodoListScreen ,
  AddTodoScreen,
});
...
Then we’ll tell our “Add Item” button in TodoListScreen.js to navigate to our new screen.
...
render() {
  const { navigate } = this.props.navigation;
...
  <Button title="Add Item" onPress={() => navigate('AddTodoScreen')} />
...
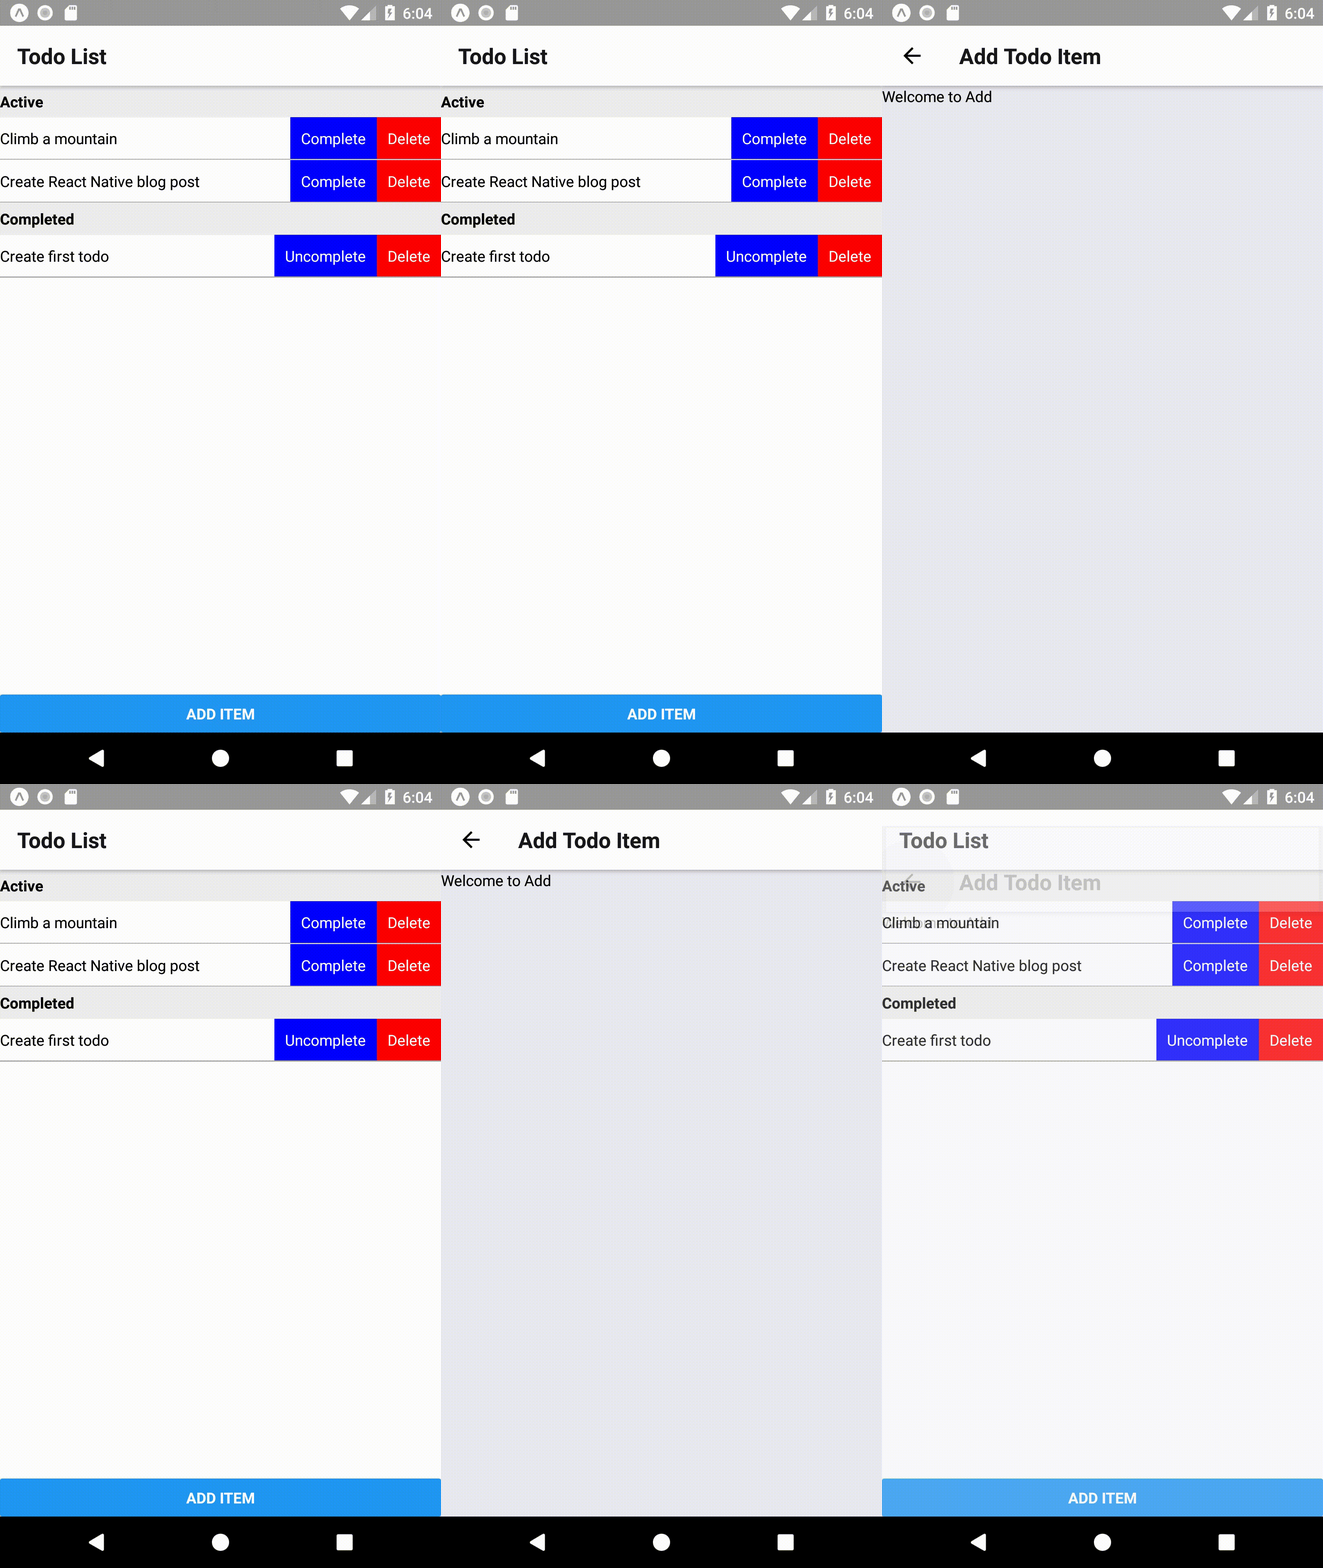
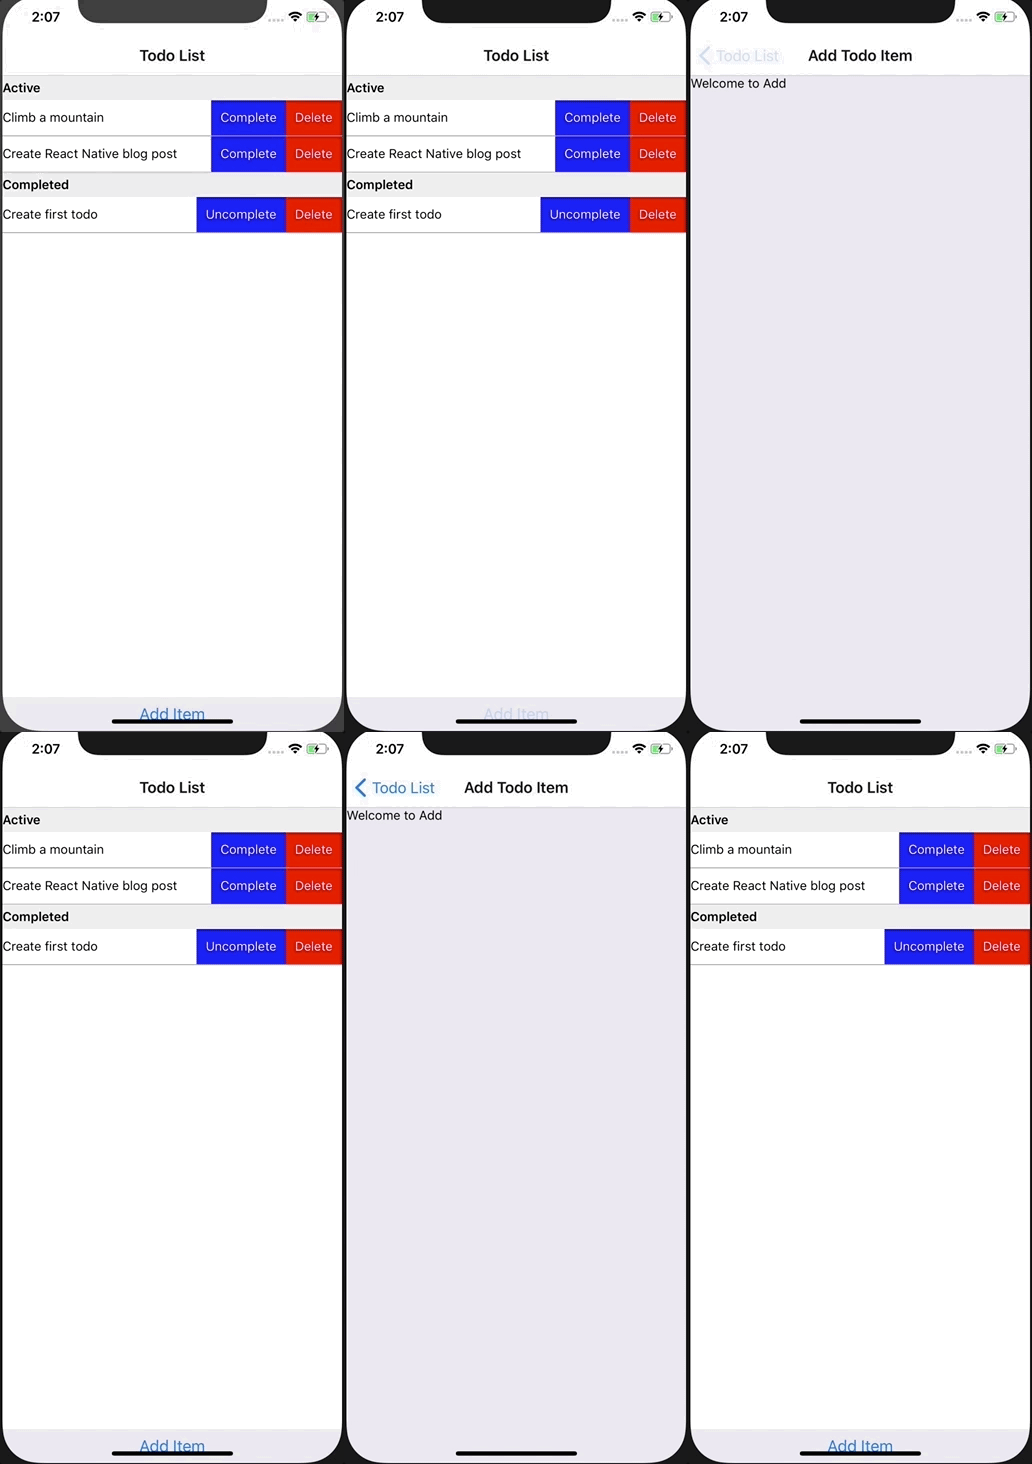
Now when we run the app we can click our button and see the new screen.
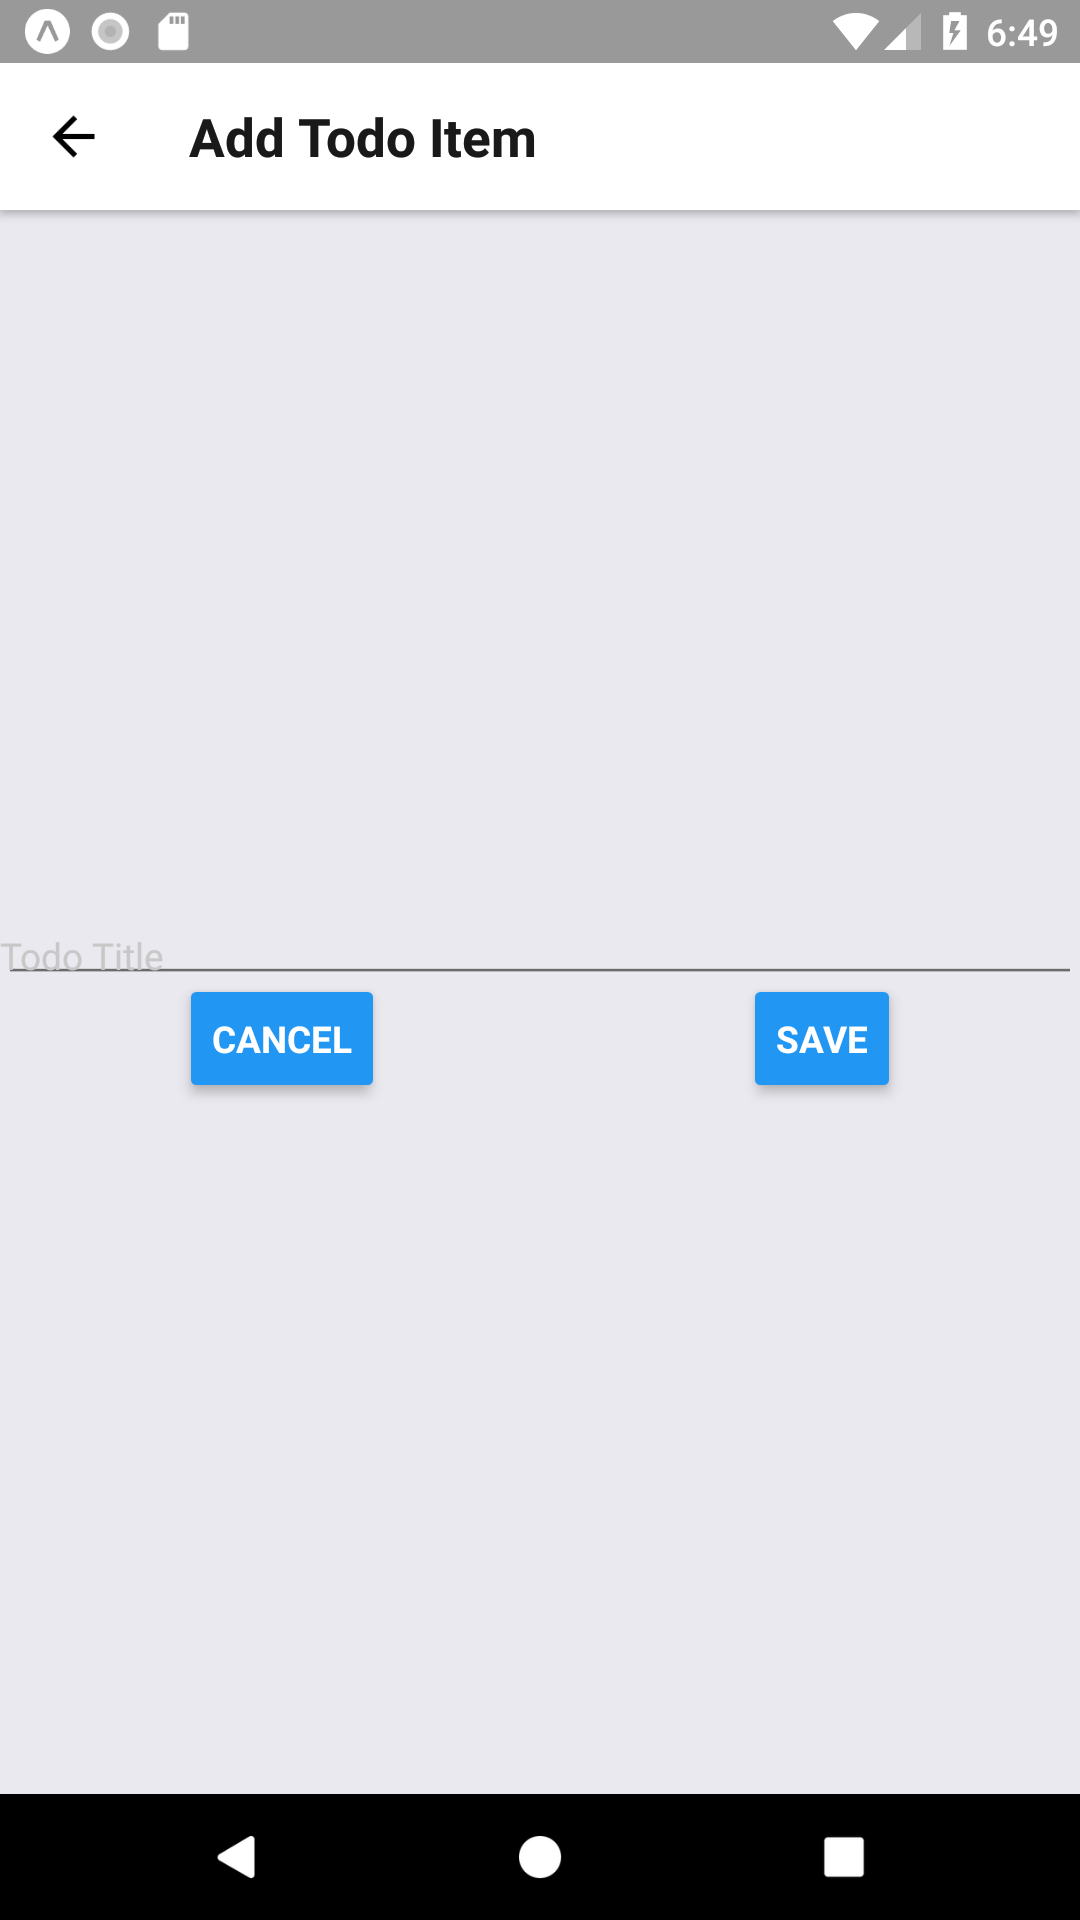
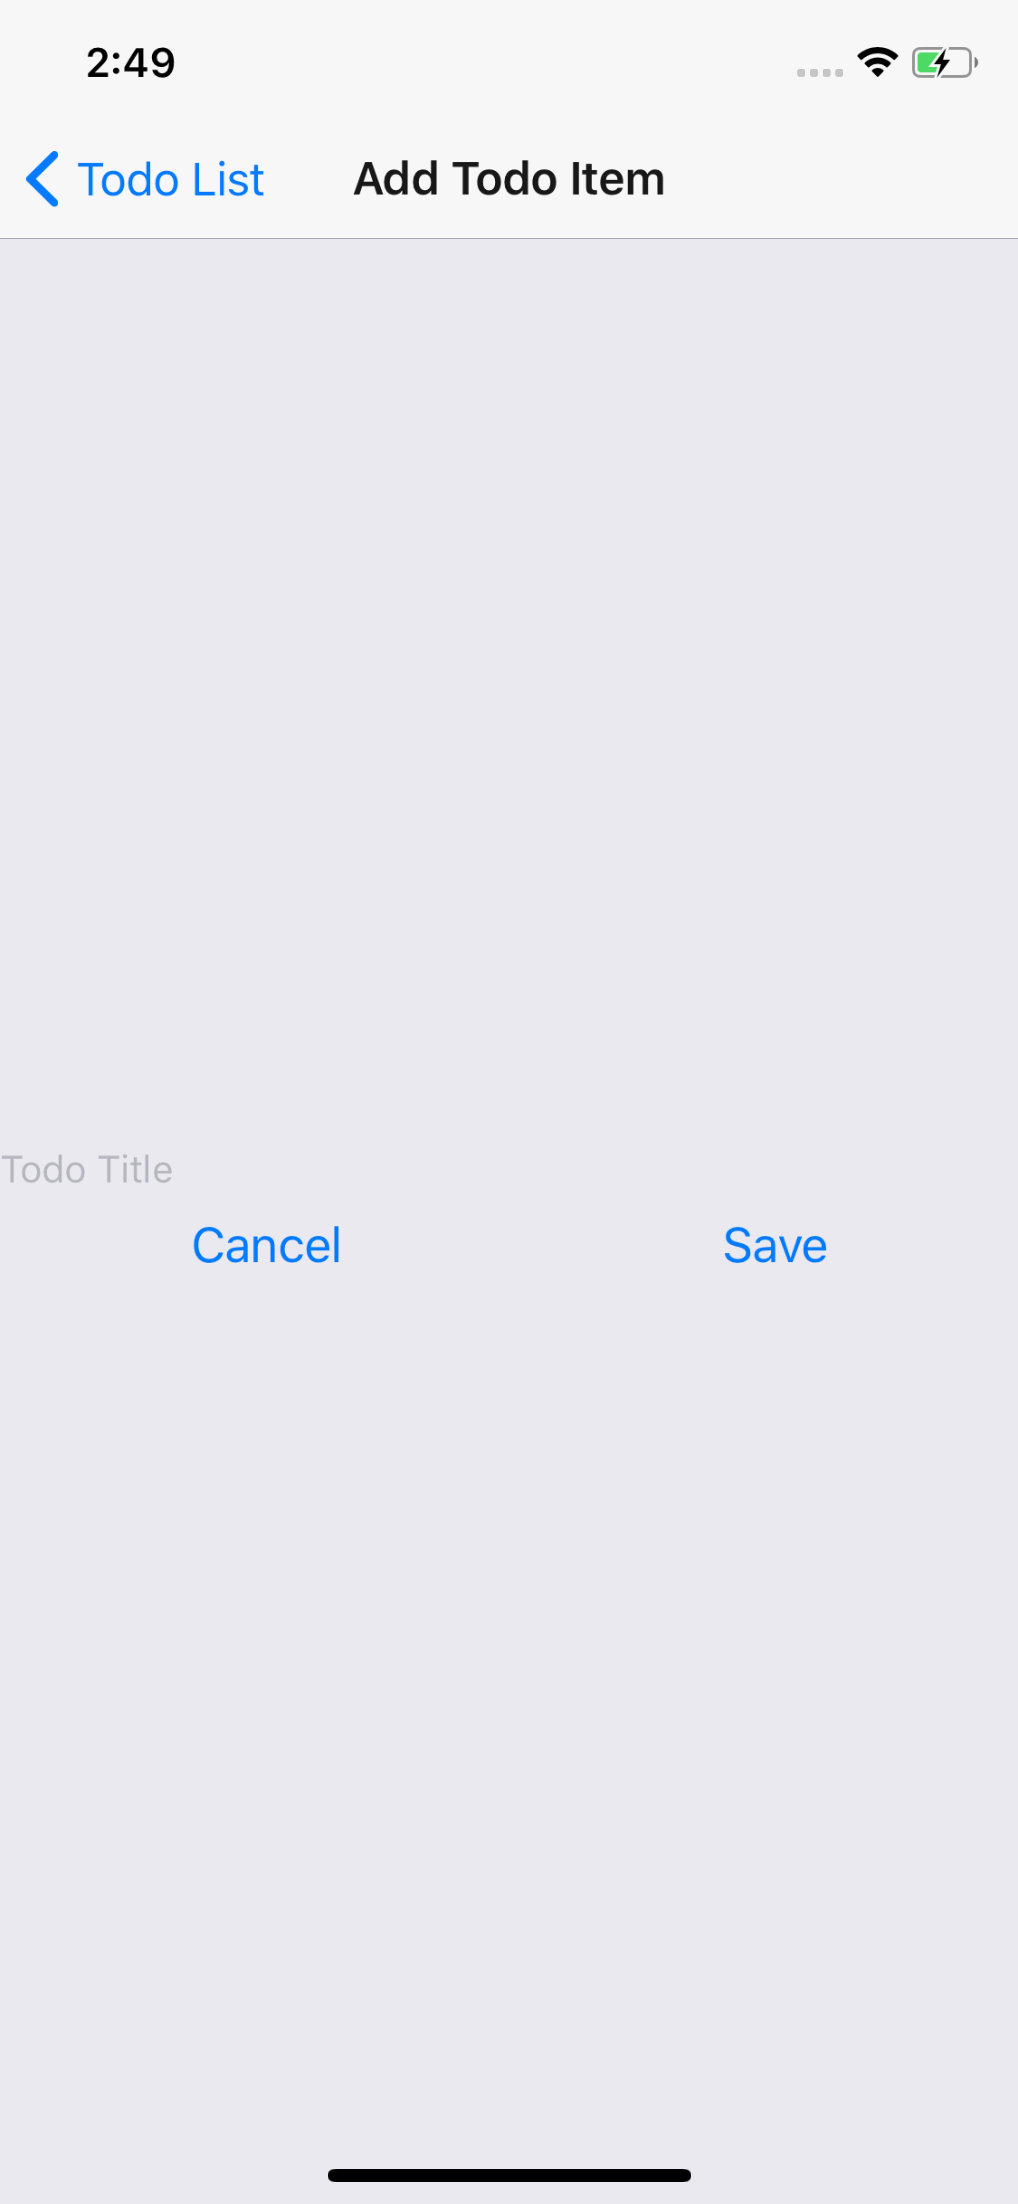
Creating the Add Todo screen is fairly similar to work we’ve already done, so we’re not going to spend much time on it. We need to edit our AddTodoItemScreen.js and add a TextInput, a Save button, and a Cancel button. We’ll set the Cancel button to go back when clicked, and leave the Save button empty for now.
import React from 'react';
import { StyleSheet, View, TextInput, Button } from 'react-native';

export default class TodoListScreen extends React.Component {
  static navigationOptions = {
      title: 'Add Todo Item',
  };
  constructor(props) {
    super(props);

    this.state = { newTodoTitle: "" };

  }
  saveTodoItem() {
      this.props.addItem(this.state.newTodoTitle);
      this.props.navigation.goBack();
  }
  render() {
    return (
      <View style={styles.container}>
        <TextInput placeholder="Todo Title" value={this.state.newTodoTitle}
            onChangeText={(text) => this.setState({newTodoTitle: text})} />
        <View style={styles.buttonsRow}>
            <Button title="Cancel" onPress={() => this.props.navigation.goBack()} />
            <Button title="Save" onPress={() => {}} />
        </View>
      </View>
    );
  }
}

const styles = StyleSheet.create({
  container: {
    display: 'flex',
    flexGrow: 1,
    flexDirection: 'column',
    justifyContent: 'center',
  },
  buttonsRow: {
      display: 'flex',
      flexDirection: 'row',
      justifyContent: 'space-around',
  },
});
Note: one interesting thing in this code is that we implemented our TextImput as a Controlled Component. It’s beyond the scope of this post to go into details on these, but controlled components give us an easy way to interact with user entered data.
Now our Add Item screen has all the UI elements we need.
Last but not least we need to implement our ‘add’ functionality. This will look similar to the code we used for Complete/Uncomplete/Delete, except that here we’ll make all our changes in a single file (AddTodoItemScreen.js).
...
import { StyleSheet, View, TextInput, Button, AsyncStorage } from 'react-native';
...
  constructor(props) {
    ...
    this.saveTodoItem = this.saveTodoItem.bind(this);
  }
  async saveTodoItem() {
    let todoItems = [];
    let nextTodoKey = 0;
    const storedTodoItems = await AsyncStorage.getItem("todoList");
    if(storedTodoItems != null) {
      const storedTodoArray = JSON.parse(storedTodoItems);
      if(storedTodoArray.length) {
          todoItems = storedTodoArray;
          nextTodoKey = Math.max(...(todoItems.map(t =>parseInt(t.key)))) + 1;
      }
    }

    todoItems.push({ key: nextTodoKey.toString(), title: this.state.newTodoTitle });

    await AsyncStorage.setItem("todoList", JSON.stringify(todoItems));
    this.props.navigation.goBack();
  }
  render() {
...
            <Button title="Save" onPress={() => this.saveTodoItem()} />
...
If we run our app now, it won’t look like anything’s happening. This is because we haven’t told the TodoListScreen to update its state when we return to the screen. We’ll do this by subscribing to the onFocus event and calling our initializeTodoList function from the event
...
    this.initializeTodoList = this.initializeTodoList.bind(this);
  }
  componentDidMount() {
    this._sub = this.props.navigation.addListener(
      'didFocus',
      this.initializeTodoList
    );
  }
  componentWillUnmount() {
    this._sub.remove();
  }
...
Now we can add Todo items!
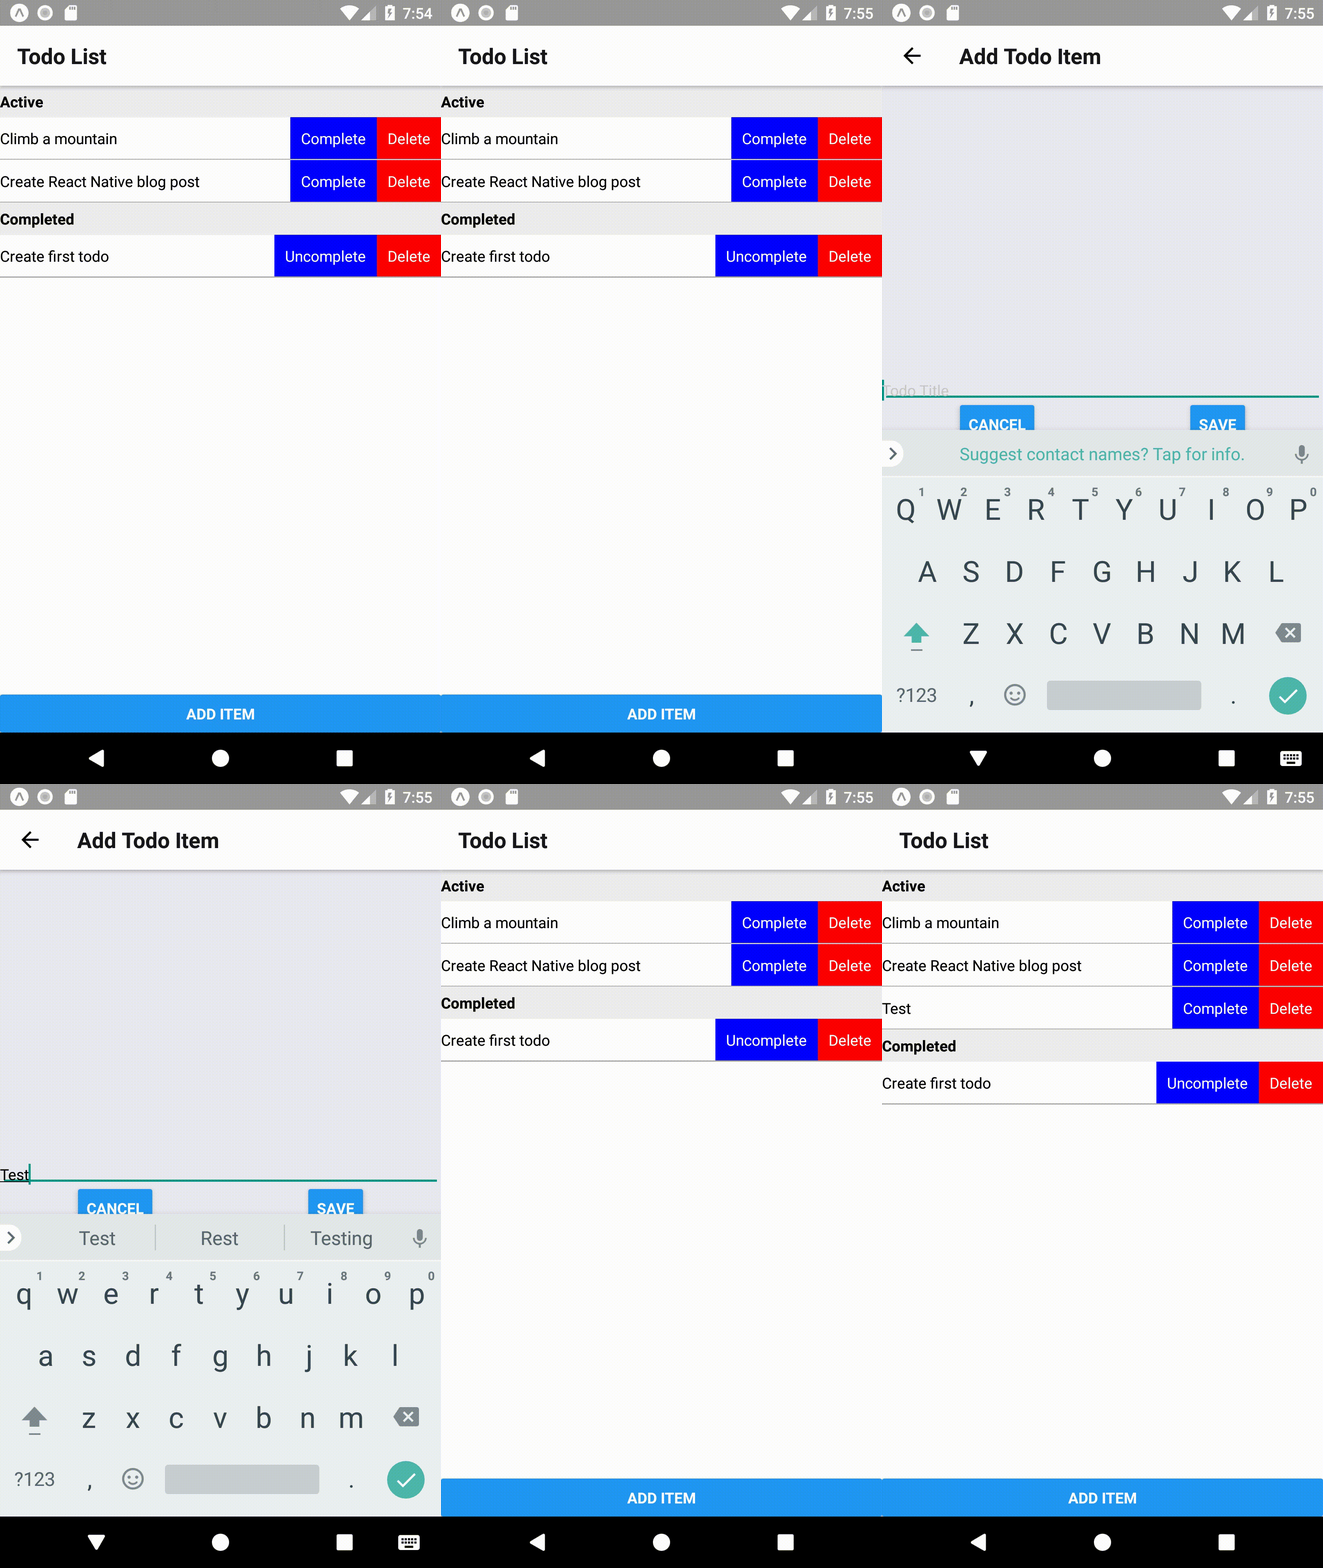
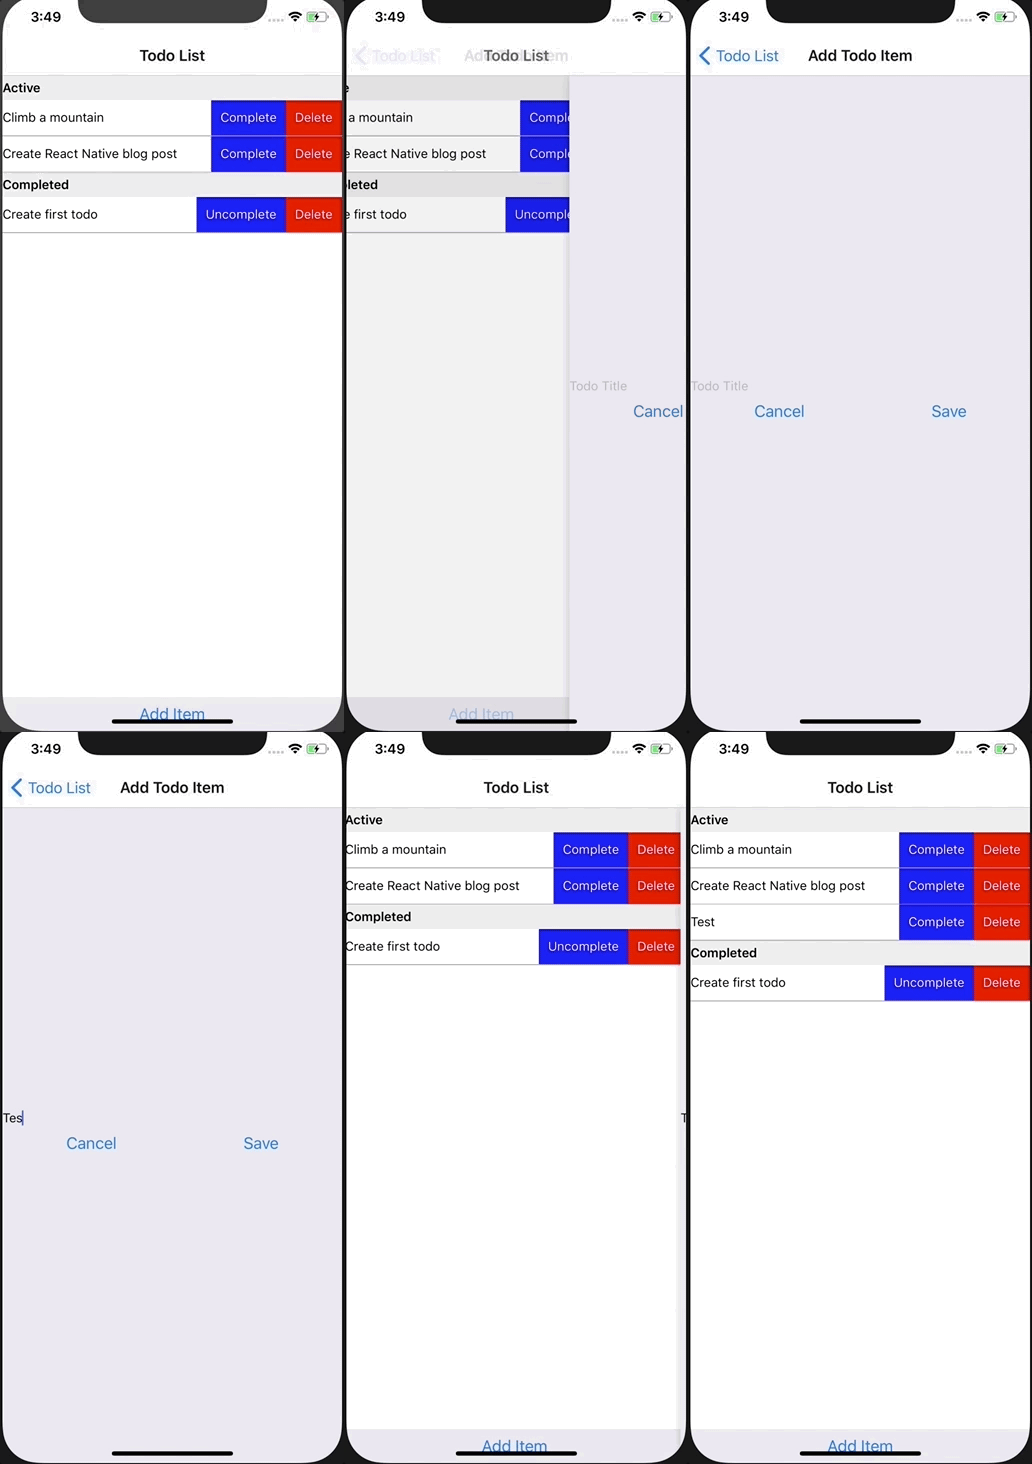
We now have a fully operational Todo App built with React native!
